
When sharing an item externally with Flatter Files you simply send a secure link. Multiple drawings can be shared with this single link. This works great for sharing a group of drawings with a specific supplier. Over time you may want to add or remove items from this link. Thus, all of the items that you share are shown and can be edited under "My Shared Items." This is very useful but it is likely that you have coworkers that might need to be able to edit this shared link or just need to verify that the supplier has indeed received the link. This is now possible with user groups. Once the item has been shared, you simply add the shared item to the user group. Once added, every user within this group will now see the shared item when they click "My Shared Items." This allows anyone in the group to verify that the drawings have been shared with the supplier, resend the link, change the password, add additional emails to the link, or delete the link.
To add a shared item to a user group. First share the item and then right click on the item under "My Shared Items." Then simply click the group that you will like to add the shared item to as shown in the image below.
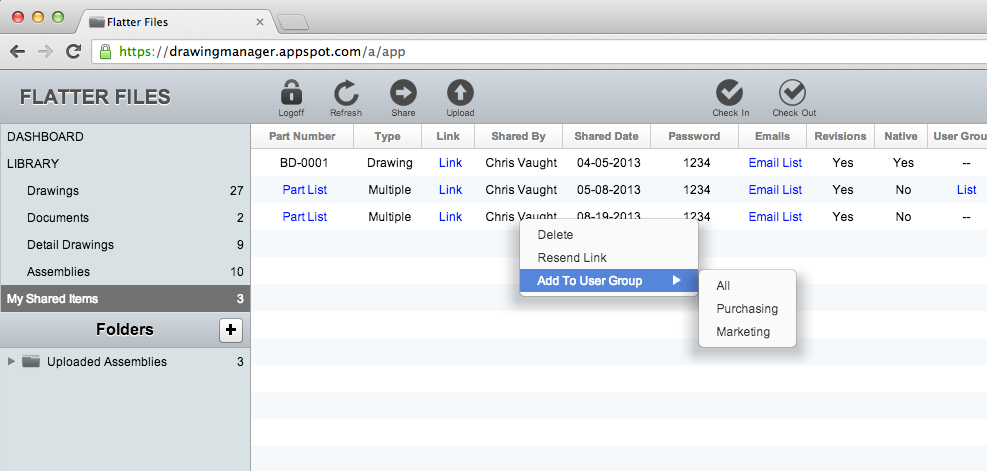

To add a shared item to a user group. First share the item and then right click on the item under "My Shared Items." Then simply click the group that you will like to add the shared item to as shown in the image below.
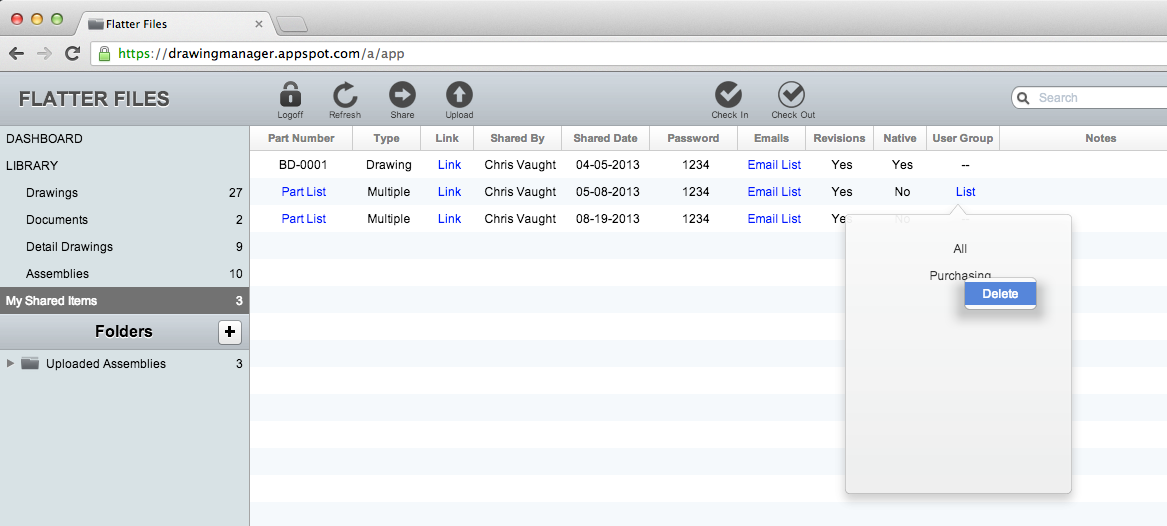
A shared item can be added to multiple user groups and removed from those user groups at any time. To view what user groups that the shared item belongs to, simply click "List" in the User Group column. Once the list is displayed, the item can be removed by right clicking in the group and clicking delete as shown in the image below.
Administrators can create and edit user groups by clicking Dashboard, Settings, and Users. At this point they will see a list of the existing user groups which by default will contain a single user group called "All." There is now a button at the button that allows for the creation of additional user groups. Once the new user group is created, users are added by simply dragging users from the "All" user group to the new user group. This new user group interface is shown in the image below.