
Flatter Files is regularly updated with feature additions that improve the product. Typically these improvements are implemented and prioritized based on customer feedback. Thus, when using Flatter Files if you have any feedback regarding the capabilities please do not hesitate to let us know at [email protected]. Below is a quick summary of the recent updates. The first three items are simple user interface enhancements. The last two items are enhancements to the PDM Integration.
Right Click Revision Menu
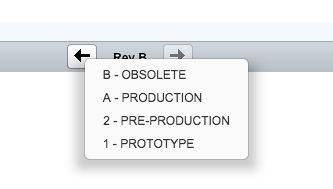
You can now jump directly to any revision contained within a drawing. When viewing the drawing, simply right click the previous revision or next revision button. A right click menu listing all of the revisions for that item will be displayed. Click the appropriate revision that you would like to jump to. For PDM items that contain a workflow state, the appropriate workflow state that was used to create each revision is also displayed in the right click menu.
Customized Checked Out Warning Message
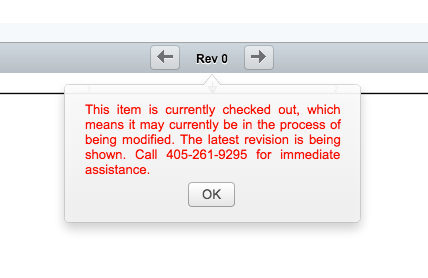
When a viewer attempts to view a drawing that is checked out, you can either block access or simply provide a warning message. Previously, you were only able to customize the message that was shown when access to the item was blocked. Now, you can also customize the warning message that is shown as well. Typically, it might be a good idea to provide contact information in the message such that the viewer knows who to contact if they have questions about the status.
Sort Search Results & Smart Libraries
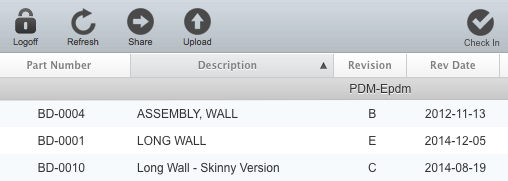
You can now sort the results for a search as well as the results contained within a smart library. When viewing the results, simply click the column header for the property that you would like to sort the results with. Click the same column header again to sort the results in the opposite direction.
Hidden PDM States
Flatter Files has always included the ability to upload PDM revisions from different states. For example, you might upload a revision created in Approved-Prototype and then another revision created in Approved-Production. To upload both, you simply enter both states as a final workflow state to upload. The problem with this is that if you upload Prototype revisions, you would not want to provide access to those specific revisions to many of your viewers or external vendors. But if that same item contains Production revisions, the users that have Prototype revisions hidden should still be able to see the Production revisions and not the Prototype revisions. Flatter Files now supports the ability to do this by allowing you to hide specific PDM state revisions from specific users.
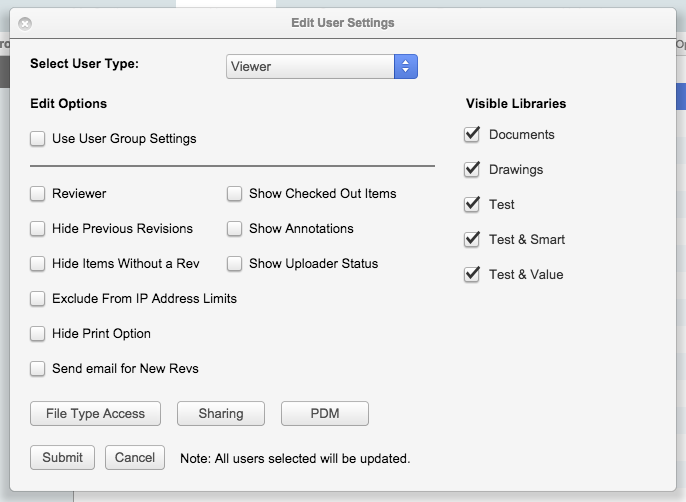
Hiding PDM states from specific users can be accomplished by going to Dashboard > Settings > Users. Simply right click on the user or selected users and then click Edit. At the bottom of the user edit window, enter the PDM states that should be hidden from the user and then click Submit. The user edit window is shown below.
To hide PDM states from your external shared links, you must enter the appropriate states to hide in your company settings. Go to Dashboard > Settings > Company and scroll to near the bottom until you see the Shared Link Settings. Enter the hidden workflow states you would like to hide and then click Update.
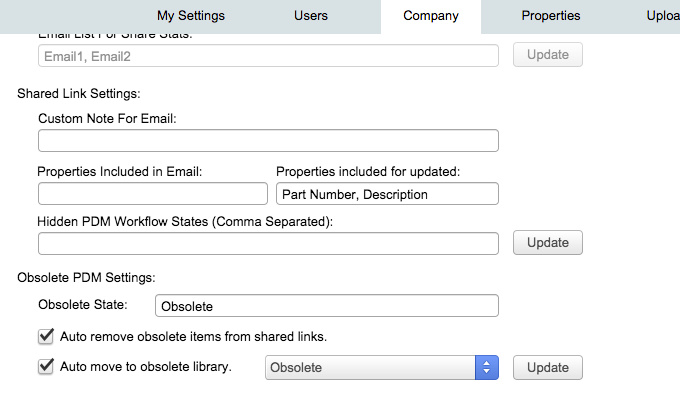
Obsolete PDM State
In addition to hiding states, you can also now declare a PDM state as being the Obsolete state. Once an item is in the Obsolete state, you can automatically have it removed from Shared Links that contain it as well as have the item automatically moved to a new Library.
The previous image above, shows the Obsolete settings. The first setting allows you to enter the PDM state that you want to designate as the Obsolete state. Typically this state is also named Obsolete but it can actually be named anything. The next setting allows you to designate if you want the items that are in the Obsolete state to automatically be removed from the shared links. The third and final setting allows you to designate if you would like the Obsolete items to be removed from all existing Libraries and moved into a new Library. Once you enable the option to move the items to a new Library, you must then select the Library it should be moved to. In the image above, the Library happens to also be named Obsolete. After updating the Obsolete settings, click Update to save the changes.