Flatter Files development is continuous and is based on customer feedback. We listen to our customers and then prioritize the development based on the feedback. Thus, if you have any feedback please pass it along. Below is a quick summary of some of the most recent updates that have been added to Flatter Files.
Limit IP Address to External Shared Links
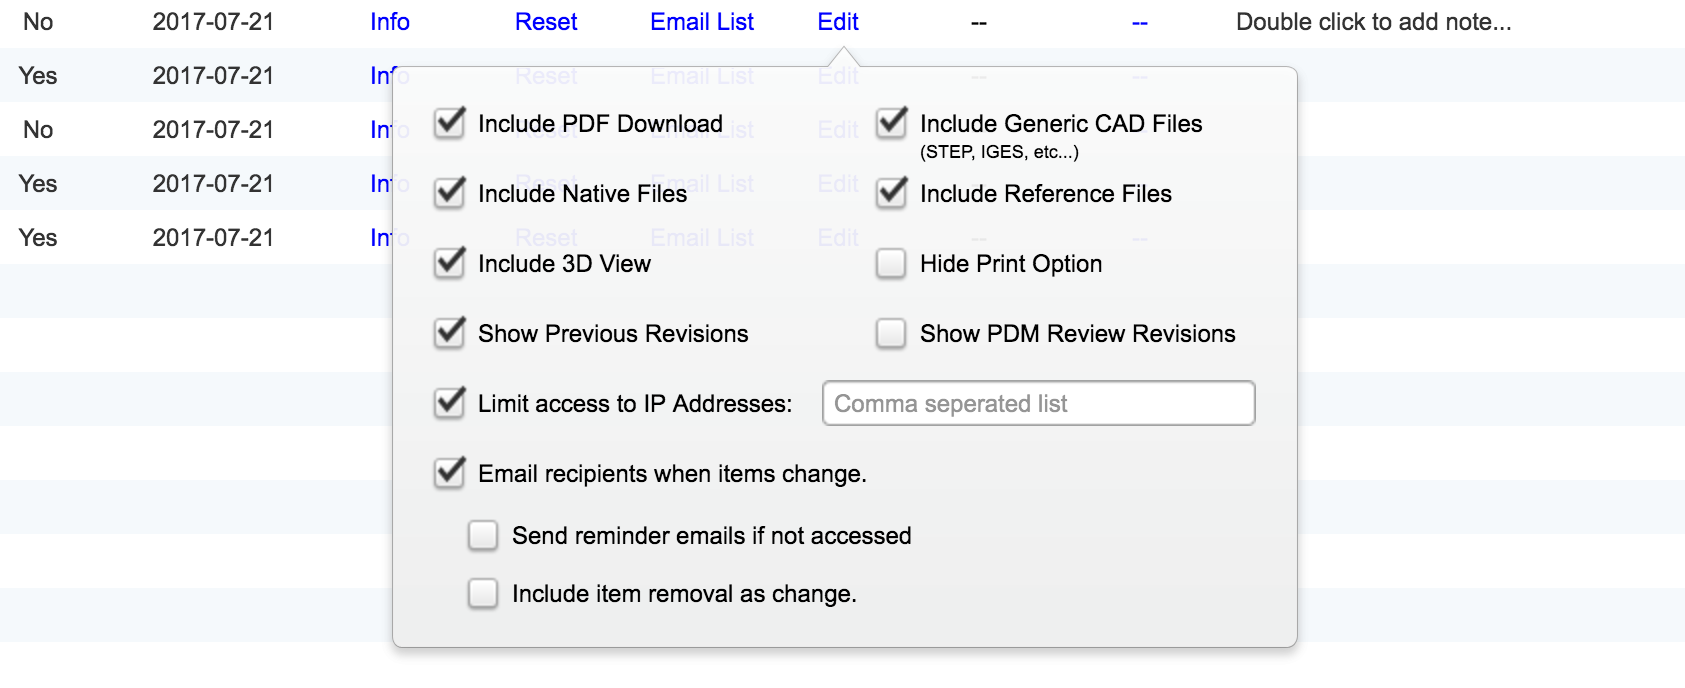
External share access can now be limited based on specific IP addresses. If someone tries to access the shared item from an IP address that isn’t listed then access will be denied. To enter multiple IP addresses separate them using a comma. In addition, you can enter a range using a dash. This will make the shared link significantly more secure but will require you to work with your external suppliers to find out the specific IP address or addresses that they use to connect to the interent. The new setting is shown in the image below.
Internal Link Updates
For quite some time, you have been able to link directly to any item in Flatter Files. This makes it quite easy to share a specific item with your colleagues as well as integrate Flatter Files with other software. For example, you might place a link to an item on Flatter Files in an Excel document. Assuming the user has access to that item, then the link will just work. Recently we have updated the internal links to be more flexible such that instead of using the unique Flatter Files link you can instead create a link to an item using a property value. Essentially you can link to any property name and value and assuming an item matches that query it will displayed in the link. The link methodology is shown below:
https://www.flatterfiles.com/v/view?link=YES&prop={name}&val={value}
You simply replace {name} with the property name and {value} with the property value. For example, the link below will return the item with Part Number C-7745621:
https://www.flatterfiles.com/v/view?link=YES&prop=part&val=C-7745621
If you are using SOLIDWORKS PDM Professional or Standard then you can also link to the item using the corresponding PDM ID as shown below:
https://www.flatterfiles.com/v/view?link=YES&prop=pdmID&val=333
The above functionality is just an option to make the links more flexible. The standard method for linking to an item on Flatter Files is to simply right click the item and choose the option to copy the link.
Multiple Item Links
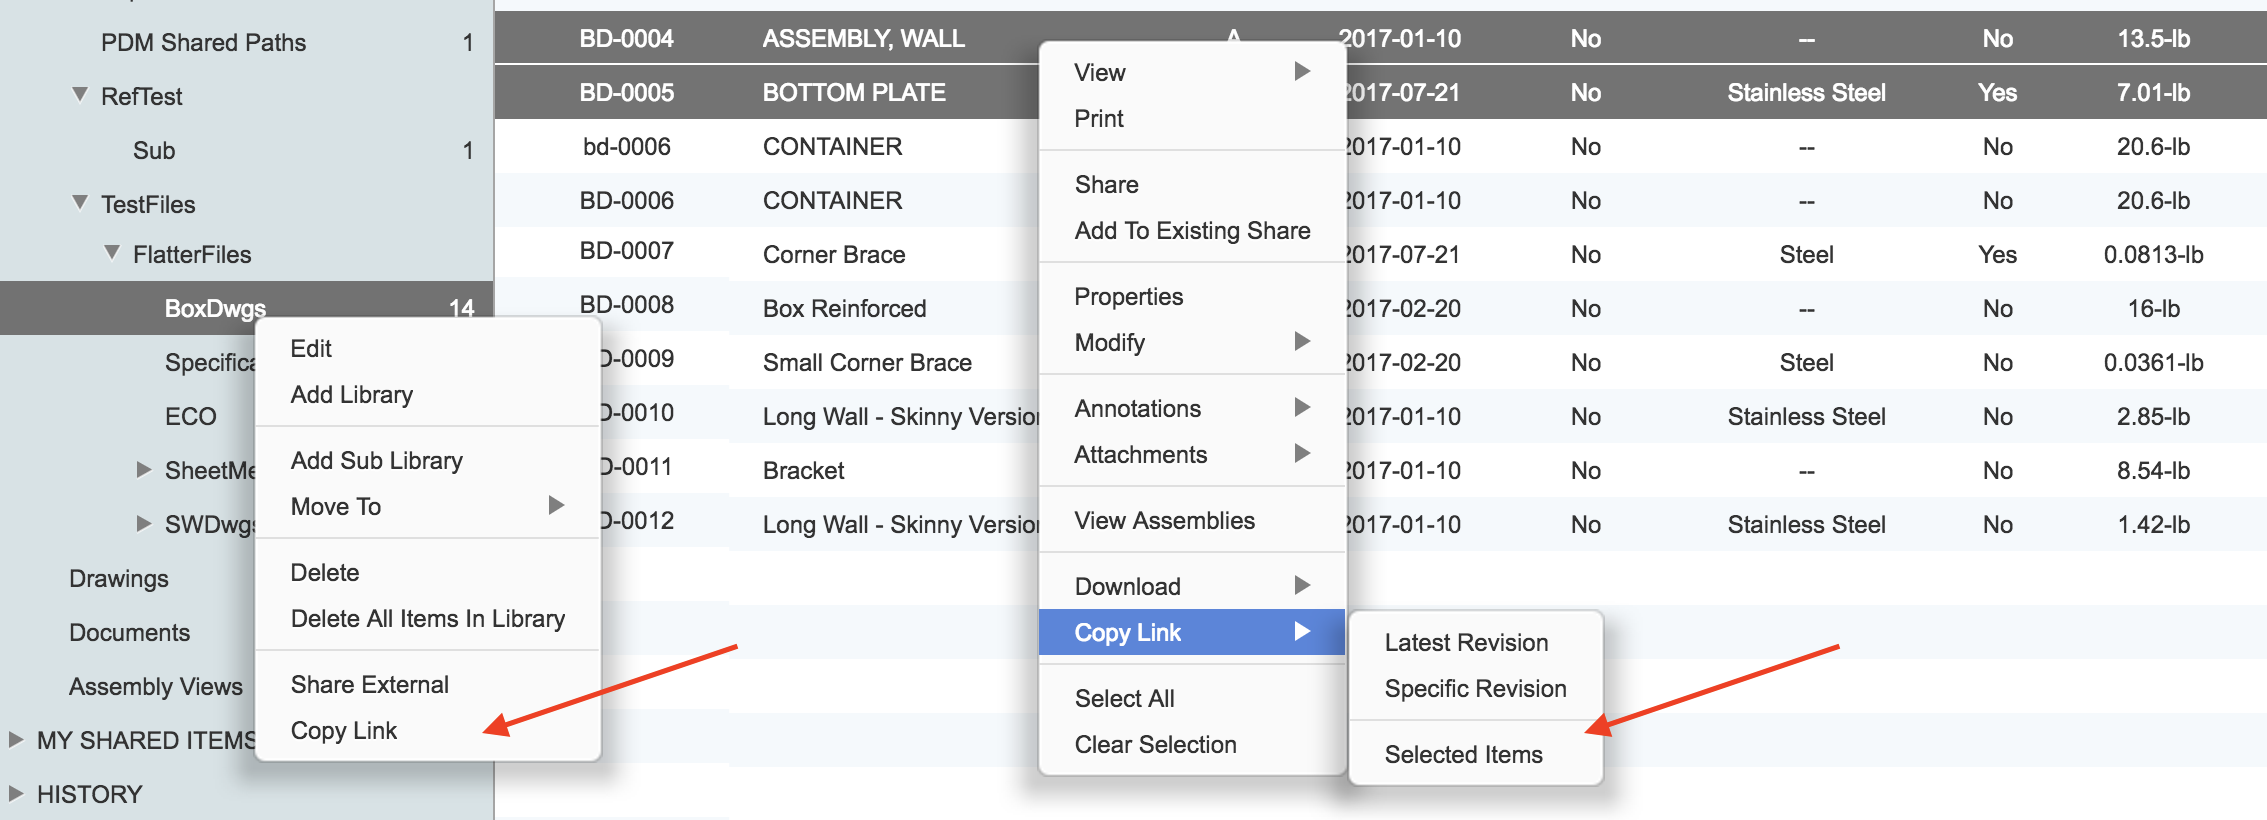
Links can also be created that will display more than one item at a time. There are two options for creating a multiple item link. You can simply select multiple items and then right click, navigate to Copy Link and then choose Selected Items. This will create a unique link for this specific list of items that can then be shared with other users within your companies account.
The second option, is to simply right click a library and click Copy Link. This will create a link directly to the Library right clicked. When a user clicks the link, they will be navigated automatically to the Library. The advantage of the Library link is that as items are added or removed from the Library the resulting link is also automatically updated since the link simply displays the current items in the Library.
Both methods of creating multiple item links are shown below.
Match Folder Structure
When uploading content to Flatter Files using the Uploader application, historically the configuration has required that you select a target Library on Flatter Files that the item will be placed in. Over the years a configuration option was added such that you could link specific sub folders to specific Libraries on Flatter Files. This still required you to manually create the Libraries needed on Flatter Files before hand and then manually connect the local folders to the correct Library. For most customers this methodology has proven to be adequate but some would like to simply simulate the local folder structure on Flatter Files. The Uploader has been updated to support this matching. Instead of selecting a specific upload Library or Libraries, you instead set the Upload Library equal to Match Folder Structure. This setting will instruct the Uploader to automatically create the necessary Libraries to match to folder structure of the items being uploaded.
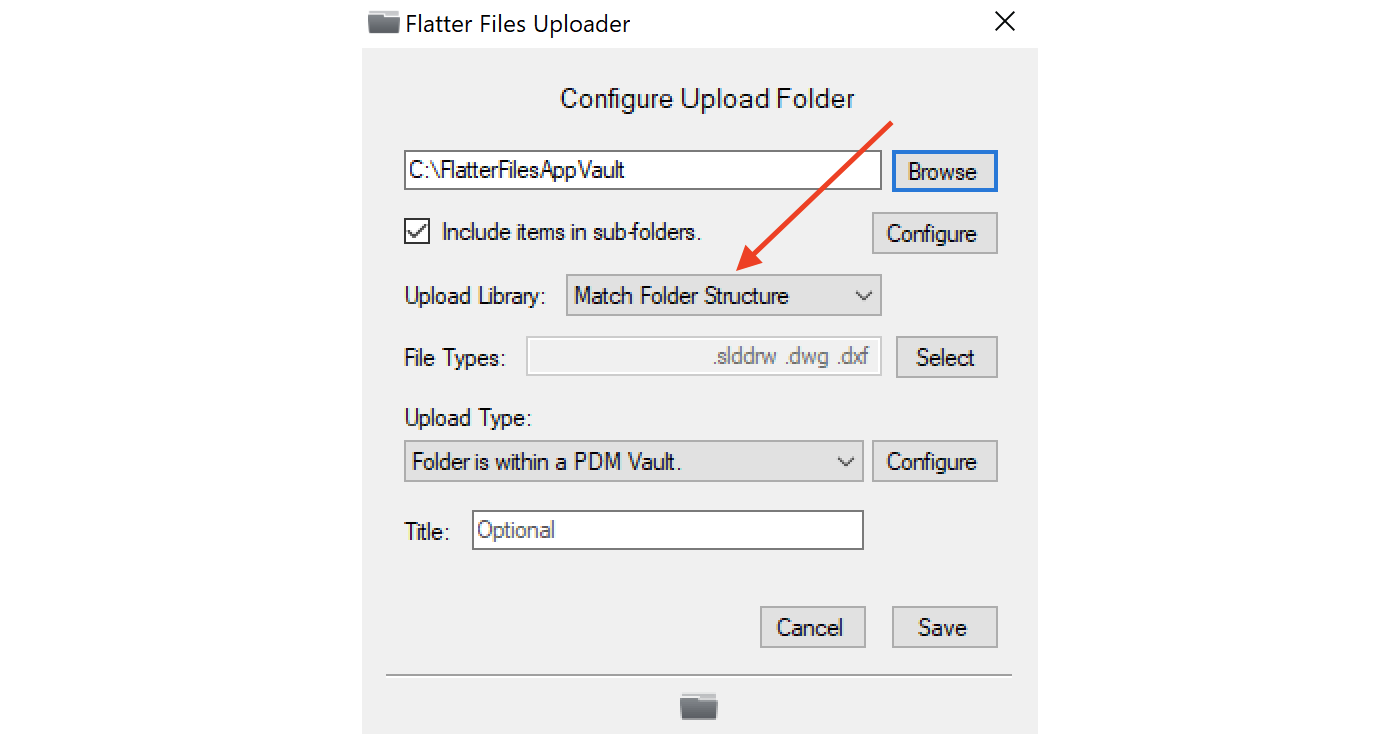
The result is each item uploaded will be placed in a corresponding Library and sub-Libraries that match the location of the folder structure of the item locally. In addition, as items are moved locally the corresponding Libraries will be updated on Flatter Files. Once items have been uploaded to Flatter Files, the items can still be added to additional Libraries just like all other uploaded items.
Local Property Export
Anytime the Uploader application uploads an item to Flatter Files, you can have it save any of the files being uploaded (PDF, STEP, IGES, etc) to a local folder. Now in addition to the files, you can save a XML and/or CSV file containing all of the property data that is being uploaded. A single property file for each uploaded item will be saved. In addition, there is an option to also save a daily summary CSV file containing all of the properties for all of the items uploaded each day. The summary filename takes the form shown below.
UpdateSummary-Year-Month-Day.csv
This automatic property export is quite useful for integrating your content with other software applications. In addition to this automatic export, you can also at any point select items on Flatter Files and click to download the properties for those items into a CSV file.
PDM Shared Paths
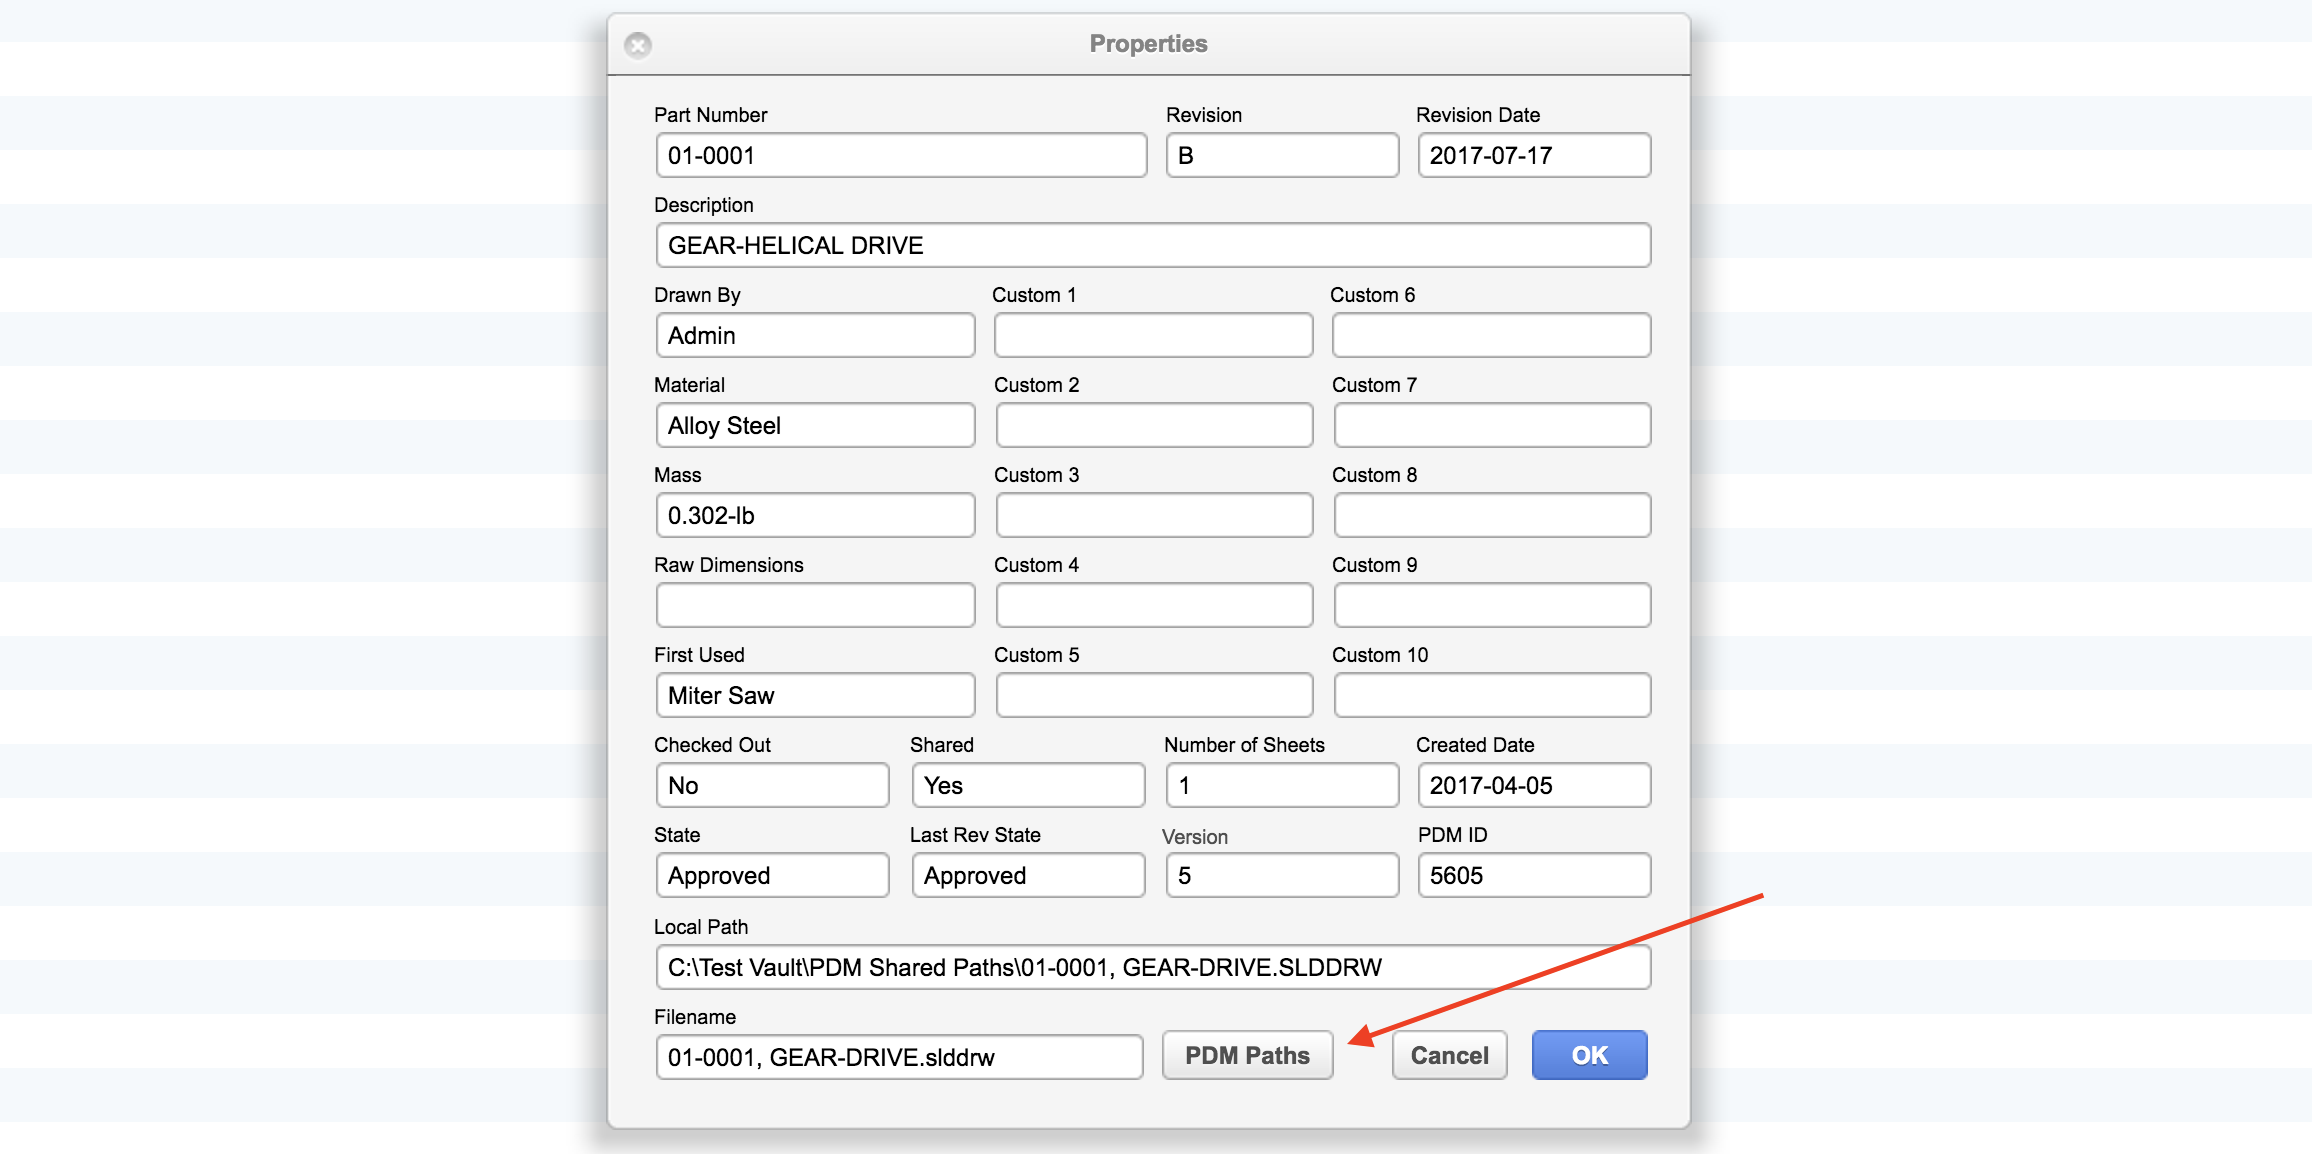
If you are uploading content from SOLIDWORKS PDM Professional or Standard, the Uploader application will now record if a file has been shared within PDM to additional locations. Each location is recorded by the Uploader and stored as property data. When viewing the properties for the resulting item there will be an option to view the paths. In addition, all of the paths will be included in the search index such that a search for any of the shared paths will return the item.
As you can see, it has been a busy few months adding new features and capabilities to Flatter Files. If you have any questions or enhancement requests, please do not hesitate to contact us at [email protected].
Flatter Files now includes an add-in for SOLIDWORKS PDM Professional (EPDM) that allows you to view the item on Flatter Files with a single click directly from your PDM Vault.
As shown in the image below, you simply right click any file in PDM Professional. The add-in will then display a “View in Flatter Files” option. Selecting this option will open the appropriate Flatter Files item in your browser. If the item selected is a part or assembly file, then the add-in will attempt to locate the corresponding parent drawing and open it directly in Flatter Files.
Obviously the majority of your users likely won’t have access to PDM Professional so this add-in won’t impact them, but for Designers, Engineers, Reviewers, and anyone else actively using PDM Professional this provides a very useful shortcut for viewing an item in Flatter Files. For example, if you are designing a part and want to view an existing drawing for reference purposes. This add-in provides a much quicker method to view the drawing versus loading the full drawing in SOLIDWORKS.
Another potential use case is when you decide you want to mark up an item that you are currently viewing in PDM. Simply view the item in Flatter Files and then you can mark the item up right in the browser without any additional software.
Installation
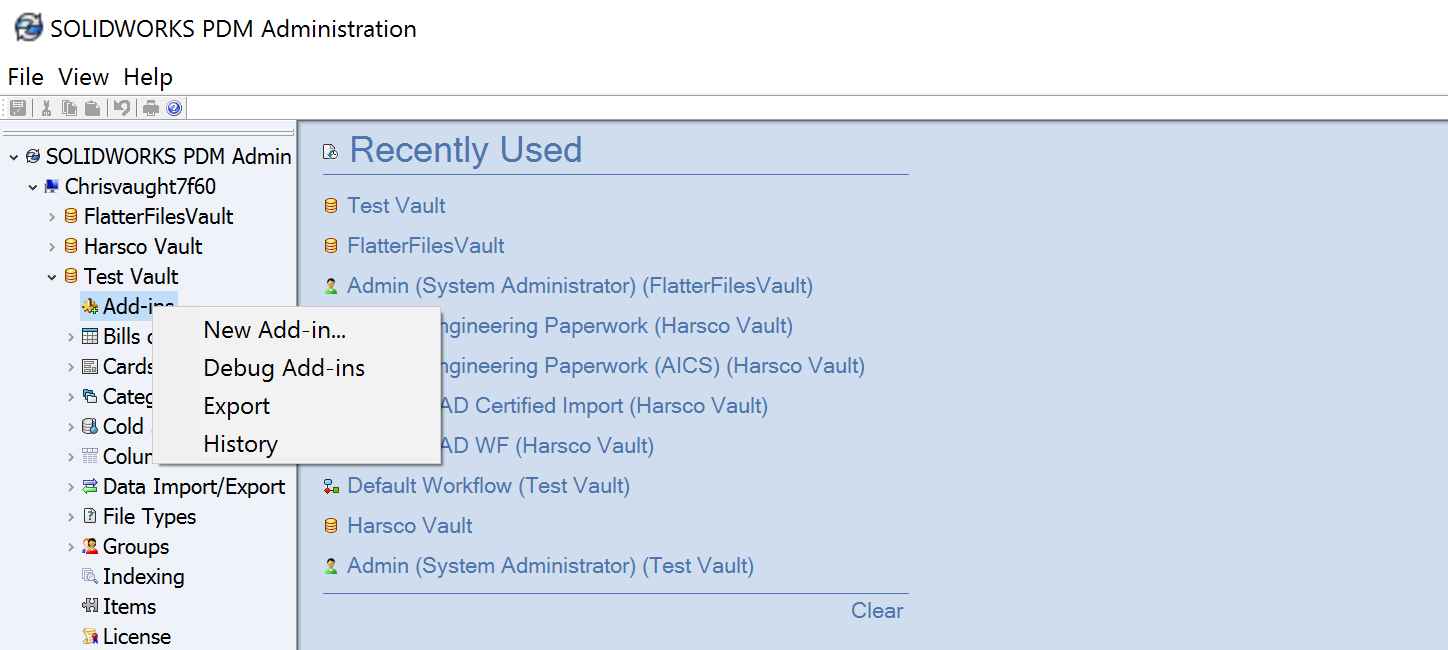
Installing the add-in is quite simple. The latest version of the Flatter Files Uploader application includes the add-in as part of its installation directory. Open the SOLIDWORKS PDM Administration application and log into your vault. Right click on “Add-ins” and select the option “New Add-in…” as shown in the image below.
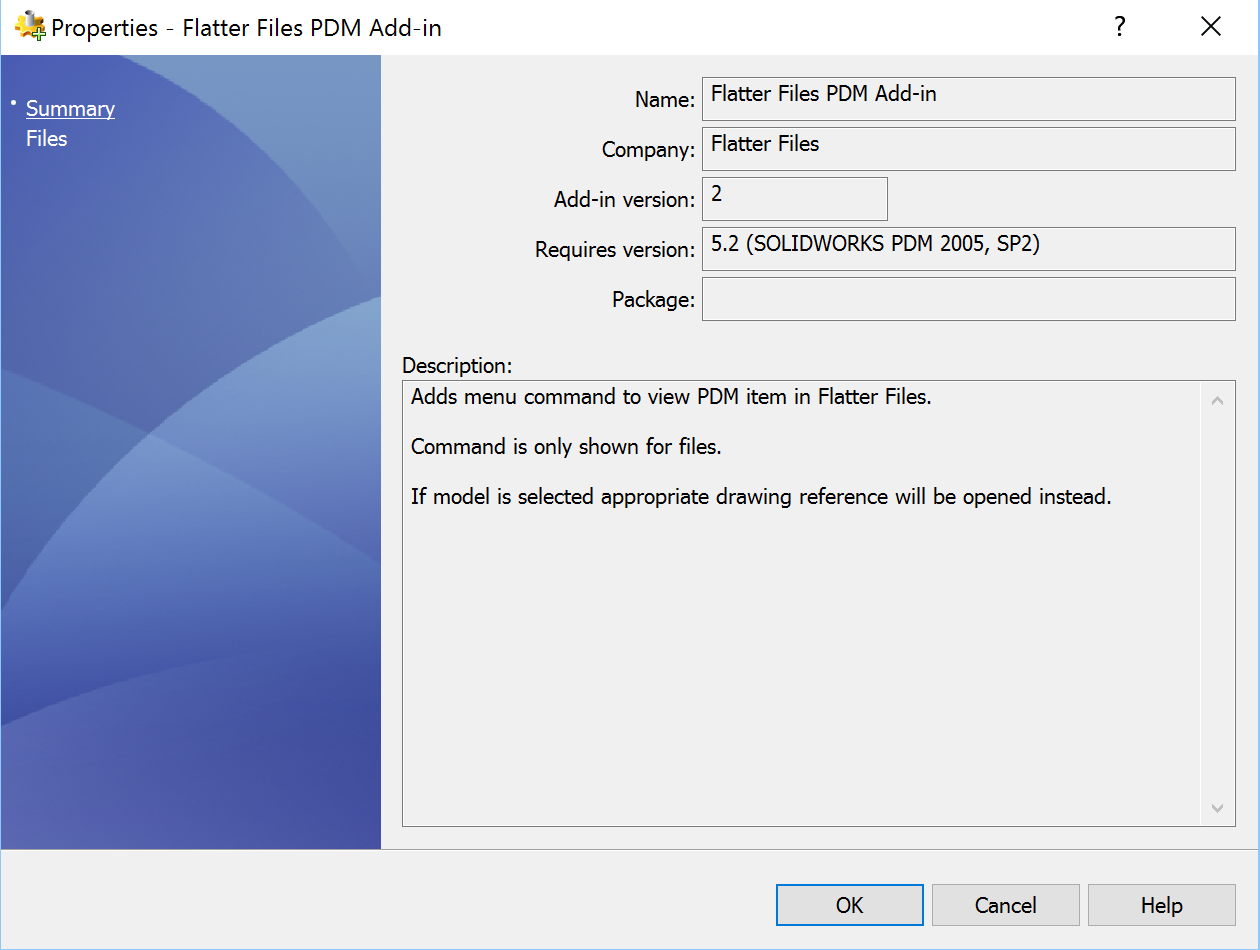
This will load a file browser. Browse to the Flatter Files Uploader installation directory (C:\Program Files (x86)\Flatter Files Uploader) and select the file named “FlatterFilesPDMAddIn.dll.” Click “Open” at which point the Add-in information page is displayed as shown in the image below.
Click “OK” which will cause a warning message regarding add-in updates to be displayed. Click “OK” to dismiss the warning message. At this point, you should now have a new entry under Add-ins called FlatterFilesPDMAddIn. When you return to your vault view in Windows Explorer, right clicking on a file should show the “View in Flatter Files” option. Clicking this option will display the corresponding file or files in Flatter Files. If the file does not yet exist on Flatter Files, then a message indicating that the item does not exist will be shown.
If you have any questions, please do not hesitate to contact us at [email protected].
Flatter Files can be integrated with Office 365 such that users will login to Flatter Files using the same credentials used to login to their Office 365 account. This simplifies the management of passwords for users, improves security, and allows you to give bulk access to user groups in your Office 365 directory without having to manually create each individual user account in Flatter Files. When a new user logs into Flatter Files for the first time using Office 365, all existing Flatter Files Admin accounts will receive an email at which point the Admin can update the users settings as appropriate. If a user is removed from your Office 365 directory they will also automatically no longer be able to access Flatter Files.
This integration is known as Single Sign On which is facilitated by a standard protocol called SAML 2.0. Flatter Files has supported SSO via SAML 2.0 for many years and we have customers that use this implementation with many online identity directories. As Office 365 has become more and more popular, many of our customers without even realizing it can take advantage of the benefits of SSO without any additional software or expense since Office 365 includes Azure Active Directory. Azure Active Directory can be setup to sync with your local Active Directory instance but it can also be used to provide SSO access to Flatter Files as well as any other application that supports the SAML 2.0 protocol.
Flatter Files documentation has included detail SAML configuration details for many years but to make it absolutely as simple as possible to get started, we have now created a detailed tutorial for integrating Single Sign On with Office 365.
If you have any questions, please do not hesitate to contact us at [email protected].
The latest version of Firefox (version 51.0) which was recently released in late January included a change that caused the Flatter Files Extension to no longer work. The breaking change they made also results in the automatic update of the extension from working. As soon as we realized this issue we prioritized development and quickly resolved the issue. Unfortunately, due to the automatic update being broken you must install a new version of the Flatter Files Extension manually by downloading and running the installer located at https://www.flatterfiles.com/extension. We apologize for this inconvenience and will ensure moving forward that the extension is tested with each version of Firefox before it is released.
The Flatter Files Extension is used to print with Adobe Reader and view content in local applications. Once installed, it will work in both Chrome and Firefox providing you with a consistent print experience and easy access to viewing your content in local applications.
If you have any questions, please do not hesitate to contact us at [email protected].
One of the most popular features of Flatter Files is the ability to automatically notify both internal users and external suppliers when a drawing has been updated with a new revision.
Today, we are excited to announce that we have integrated with Office 365 such that Flatter Files accounts can be configured to use a customers Office 365 account for sending emails. Once setup, the emails will originate from your actual Office 365 account. They will even be shown in the Sent Items folder for the particular user account that was used to send each email.
For example, the Office 365 user account for the user that shares an item externally will be used to send all of the emails that pertain to that particular share. Both the original share creation emails as well as revision update emails will all be sent from that users account. The resulting emails will show up in the Sent Items for that particular user in Outlook.
This functionality significantly improves your company branding when sending emails to your suppliers. In addition, internal emails will arrive much quicker since they are being sent and received on the same domain.
More Details
The user sending the email must be part of your Office 365 domain and they must have a functioning mailbox. Otherwise, Flatter Files will continue to use an existing 3rd party method to send the emails for that user.
Flatter Files will locate the correct user based on a matching email address between the Office 365 user and the Flatter Files user. If that doesn’t match then it will attempt to match the user based on the first and last name.
Internal new revision emails will be sent from the mailbox of the user logged into the Uploader that uploaded the new revision assuming there is a matching Outlook mailbox to use. It is recommended that a dedicated mailbox account be used by the Uploader such that the Sent Items folder for a regular user isn’t cluttered with these automatic emails.
If anything causes Flatter Files to either not find a matching Office 365 user account or if simply an error occurs during the process then the existing 3rd party email provider will be used to send the email.
Configuration
Configuring this functionality is quite simple although your Office 365 admin will need to be involved. Just follow the steps outlined below:
-
Locate your Office 365 Tenant ID. Your Tenant ID is a unique identifier for your Office 365 account that will be attainable by an Office 365 admin per these instructions.
-
Login to Flatter Files using a Flatter Files Admin account.
-
Go to Dashboard > Settings > Company Settings and scroll to the bottom of the page where the Misc Settings are located.
-
Under Misc Settings you should see an option called “Use Office 365 to send emails” as shown in the image below:

-
Enable the usage of Office 365 by enabling the setting.
-
Enter your Tenant ID in the appropriate input field and then click Update.
-
This will open a new Tab (make sure your popup blocker doesn’t block it) that will ask you to login with your Office 365 account if you are not already logged in to it.
-
Once logged in you will be asked to grant the required permissions such that Flatter Files can send emails on your users behalf. These permissions must be granted by an Office 365 account admin. If you are not an Office 365 account admin then close the tab and disable the option in Flatter Files until an Office 365 admin can help you by granting the appropriate permissions.
If you have any questions or enhancement requests, please do not hesitate to contact us at [email protected].