This document will show you specifically how to locate and access your content on Flatter Files. For details regarding how to upload your content to Flatter Files please see the Uploading Content documentation.
Your content can be accessed via the web app as well as the native iPhone, iPad, and Android applications. This Getting Started document applies specifically to the web app but the same procedures can generally be used on the mobile applications.
The web application is loaded by clicking login at the top right of this page or by clicking here. The web app will display a login screen for you to enter your credentials. If your company has implemented Flatter Files but you have not received login credentials for the account please contact your companies account administrator and request that they add you to the company account.
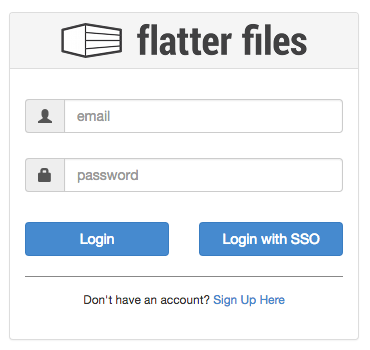
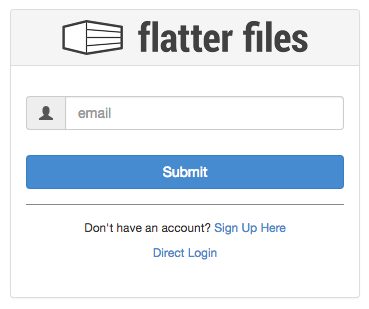
Enter your email and password into the login window. Click Login when you are ready to proceed. If your company has enabled Single Sign On (SSO) then click the Login with SSO option. Single sign on allows you to user your company login credentials that you use for other things such as email to login to Flatter Files. Clicking the Login with SSO option will display a new login screen that only contains an input for you to enter your email address as shown below. Click Submit to proceed with the single sign on. Using your email address, Flatter Files will redirect your browser to the correct sign in page for your domain. Once you login successfully you will automatically be redirected back to the Flatter Files web app.
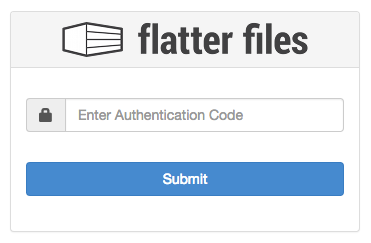
If logging in directly to Flatter Files (not using SSO), your account administrator can require two step authentication. If your account has required two step authentication and this is your fist time accessing your user account then you will automatically be shown a screen to enter a phone number to receive text messages. Optionally if your account allows the two step authentication to occur via email there will be an option to use your email instead of a text message. Enter the required information and click Submit.
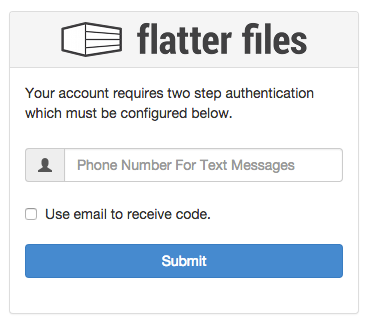
You will then be sent an authentication code via text message or email depending on the option you selected. The screen below will also be shown asking you to enter the code. Enter the code and click Submit. If the code matches then the current device will be authenticated for 30 days. After 30 days you will be sent a new code when you try to login to re-authenticate the device. In addition, all new devices must also be authenticated.
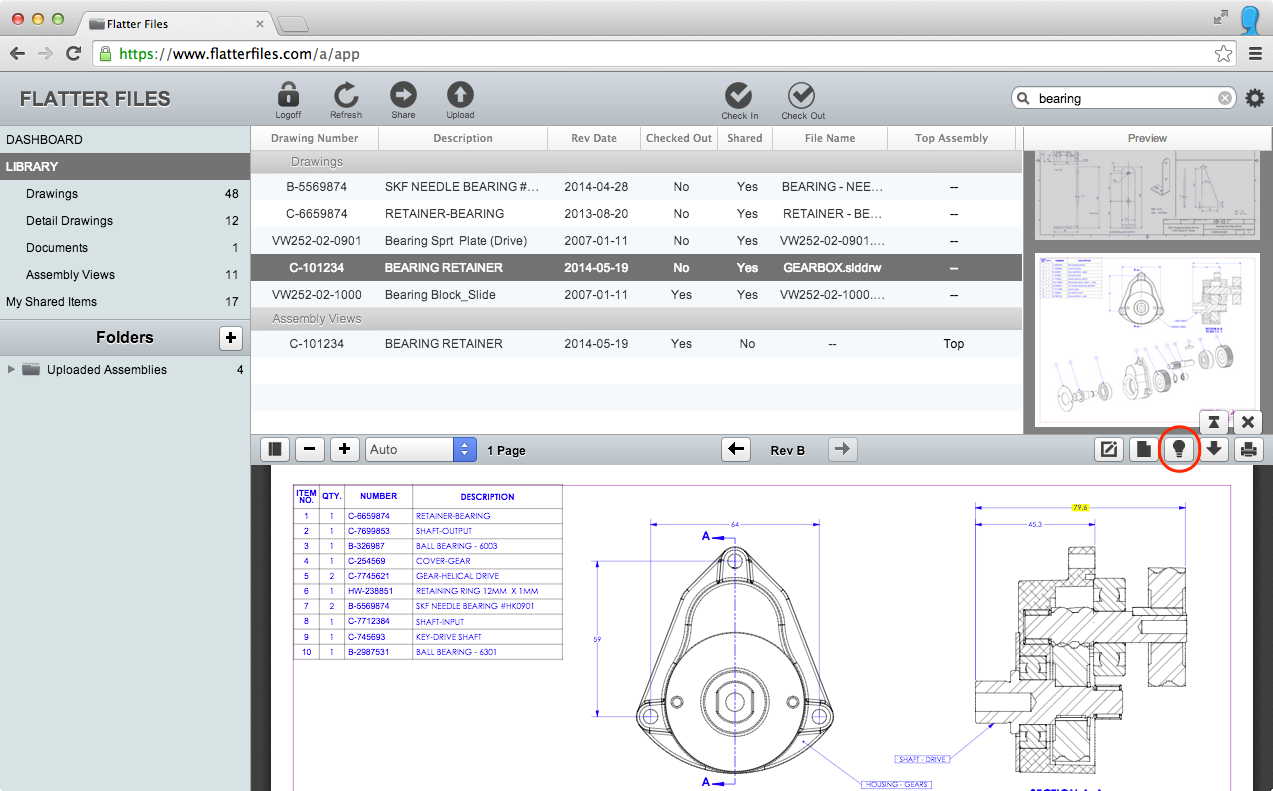
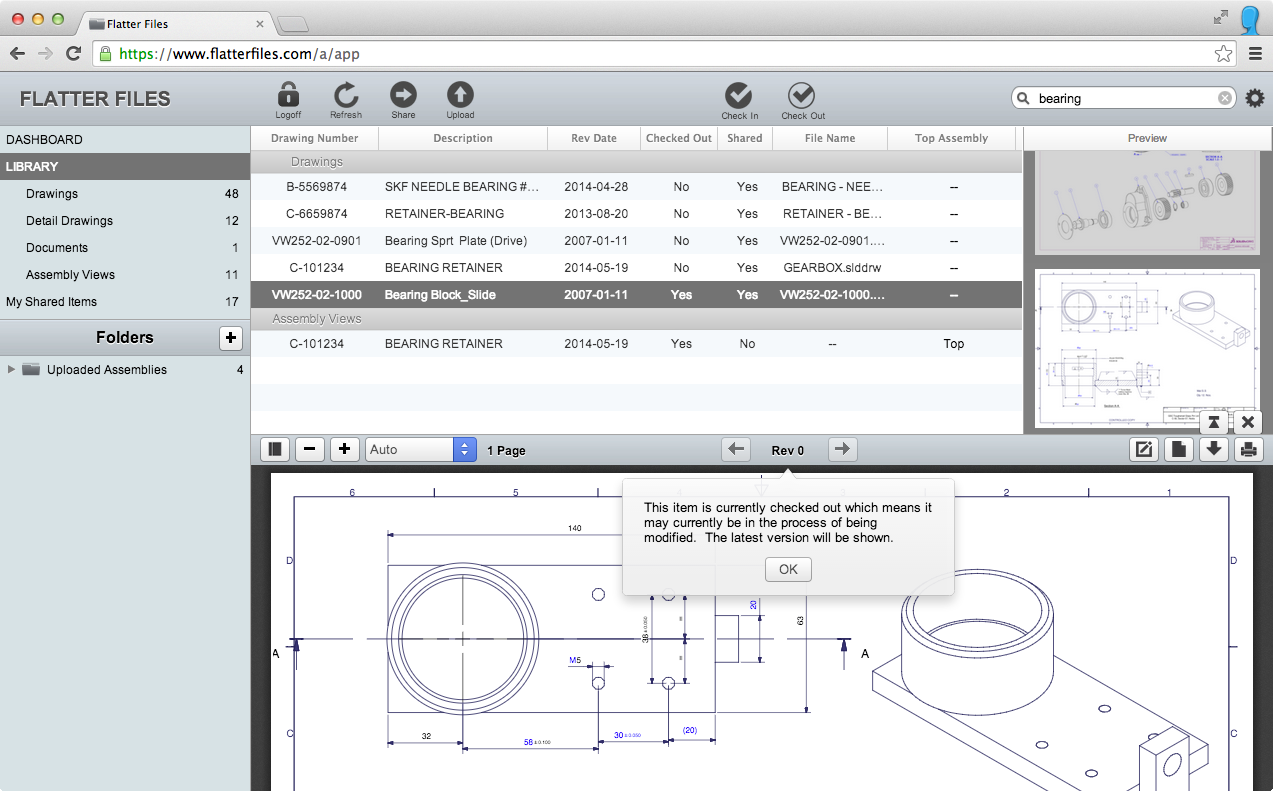
After you login, a list of drawings or documents is shown. Typically your account is going to contain many items so scrolling through the items to locate an item isn’t advised. Instead you will want to perform a search for the item in the search box at the top right of the web application.
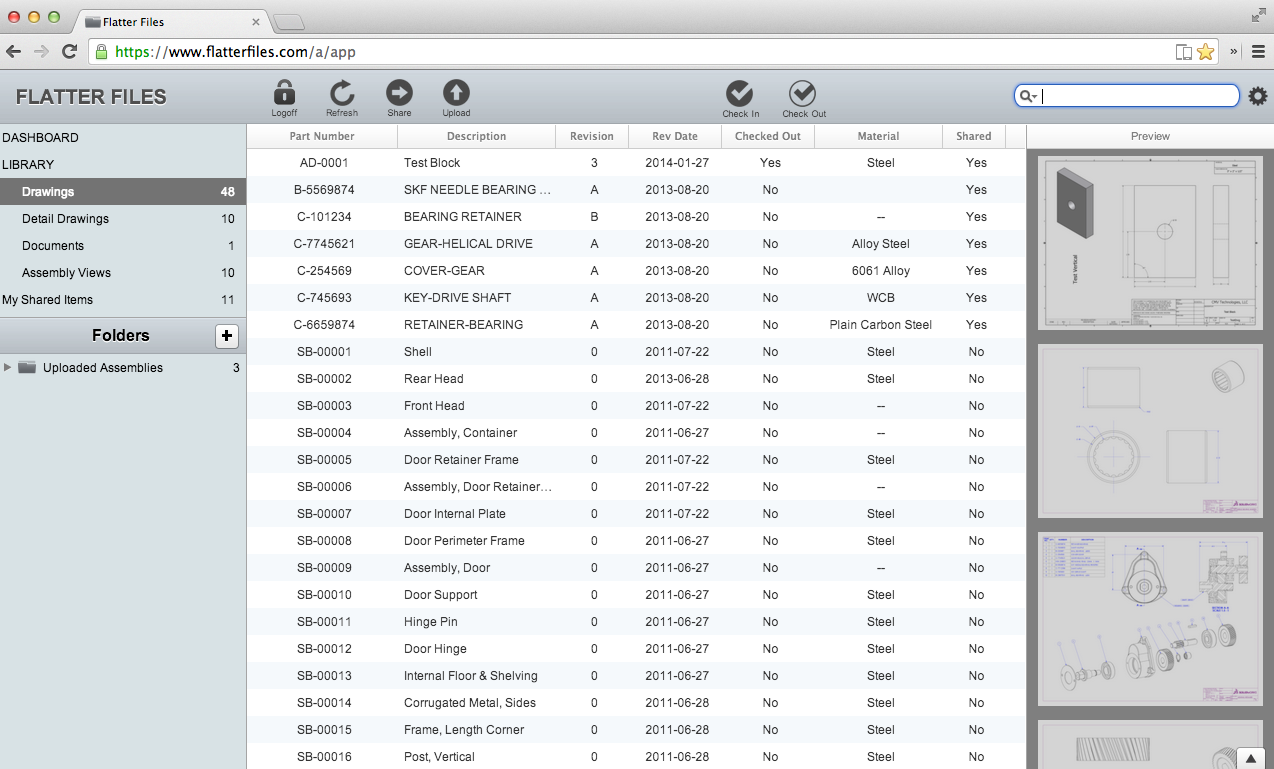
The search query can contain a part number, description, file name or any other property. Enter the query and hit enter on your keyboard to submit the query. The search results are returned and will be listed along with the corresponding preview images on the right-hand side.
Both the list of drawings, as well as the preview images on the right, are scrollable. As you select one, the corresponding preview image or drawing will also be highlighted making it easy to determine if you have found the correct drawing.
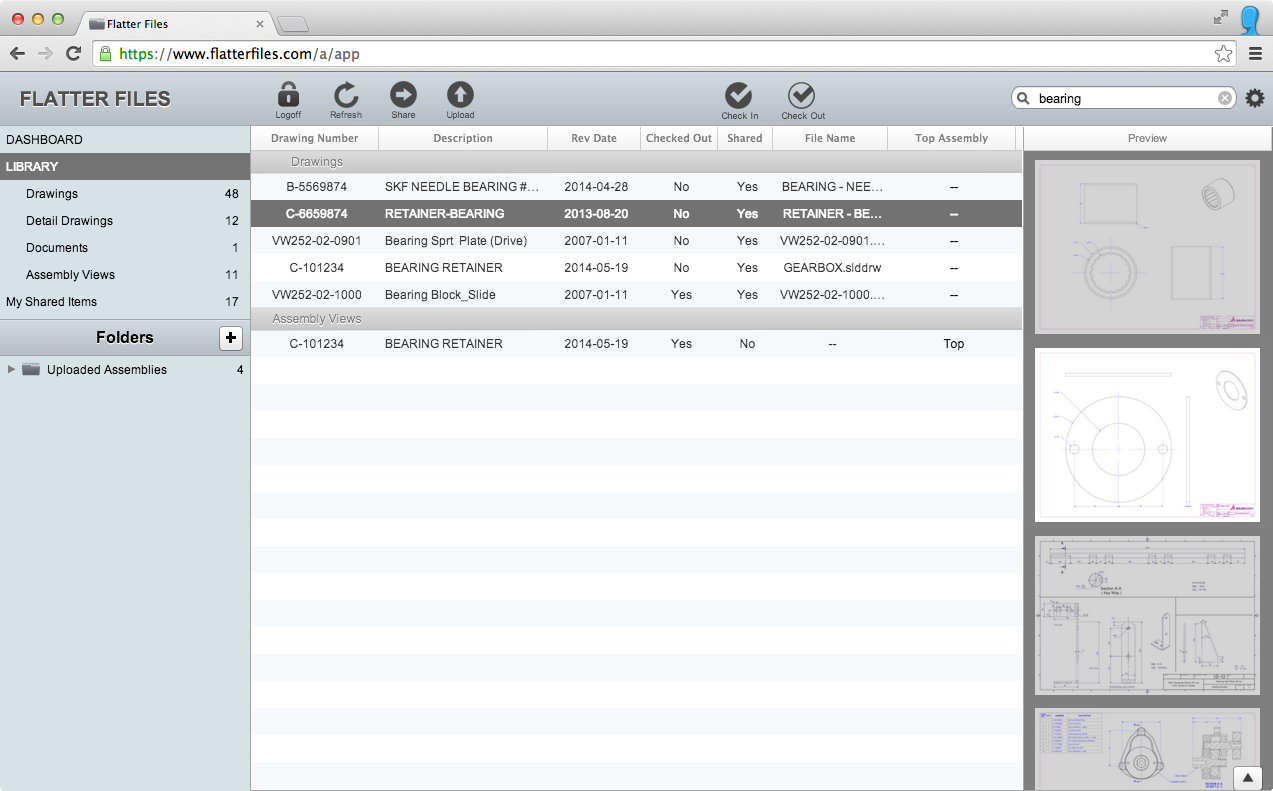
As you can see in the image above, a query was entered into the top right search box and was submitted, which returned the list of search results. The second item was then selected in the results list, which also highlighted the preview image along the right side. This allows you to quickly determine if it is the correct item.
Flatter Files supports many advanced search options to help you quickly locate the content you need to access. Details regarding the advanced search capabilities can be found in the Access Details documentation.
Once you have located the item to display, simply double click it to view the PDF of the drawing. Optionally, you can right-click and select the first option “View”.
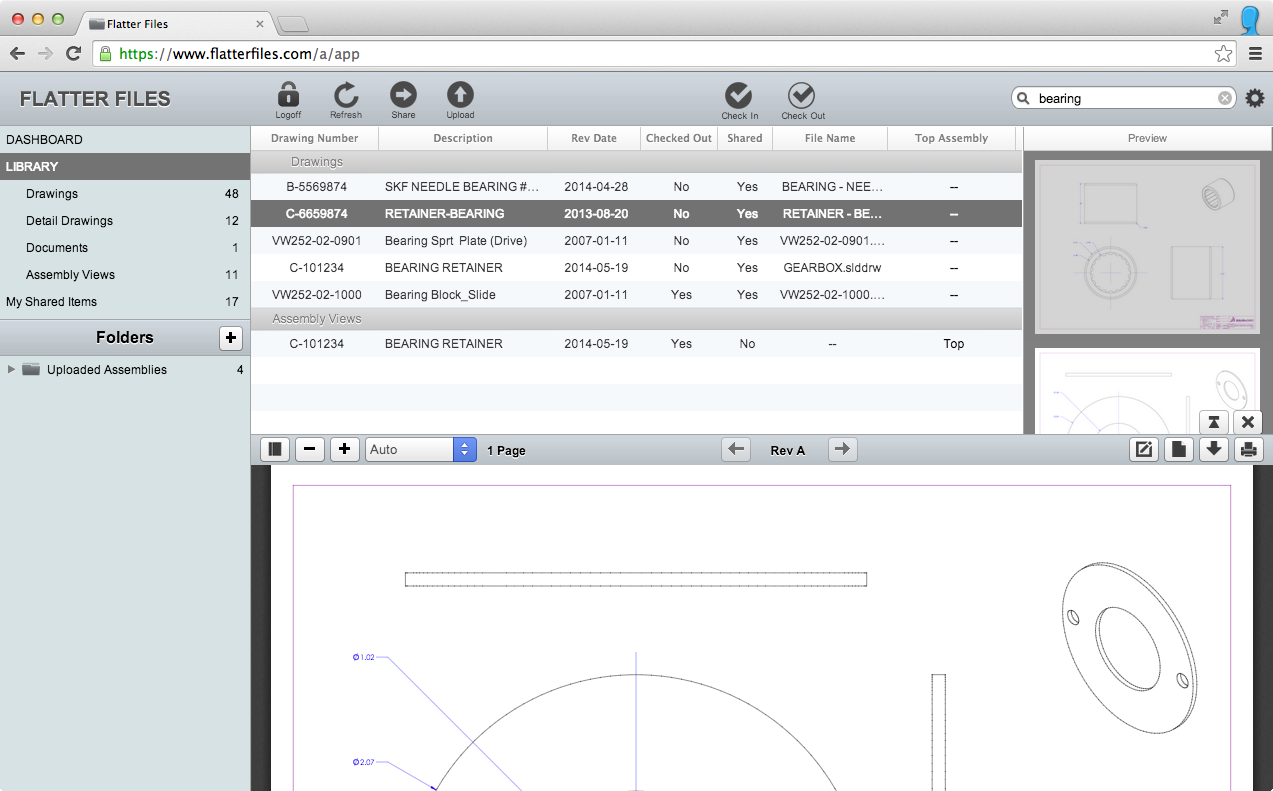
The bottom half of the web app has now rendered the PDF natively directly within the application. The built-in PDF viewer includes the typical viewer controls along with a few specific controls for Flatter Files functionality that will be discussed later in this documentation.
The PDF viewer can easily be enlarged. On the far right side, just above the the actual viewer there are two buttons. The one farthest to the right is an X that will close the viewer. The other button will make the viewer expand to the top of the web app to aid in viewing the drawing.

Drawings are listed as a single entity within Flatter Files, but can contain many components, including multiple revisions. At the top of the viewer, directly in the center, the current revision value is displayed. Just to the left and right of this value are arrows pointing left and right. Clicking the arrow on the left will allow you to view a previous revision. Clicking the arrow on the right will allow you to view a newer revision. By default the latest revision is always displayed and the buttons are only active if multiple revisions exist.
When viewing an item sometimes it may be in the process of being modified. If this is the case, Flatter Files will consider the item checked out and there are two options. If your account administrator has blocked access to the checked out item, then you will receive a message notification that contains custom text. Typically this is a message with info on who to contact if you need the drawing right away. If access hasn’t been blocked, then the latest revision of the drawing will be displayed but a dialog will appear on top of the drawing notifying you that the item is checked out. The dialog is shown in the image below.
If multiple revisions have been uploaded for an item, the the viewer will contain a button with a lightbulb as the icon. When pressed, this button will replace the PDF with a version that highlights the text that has changed since the previous revision. This allows you to quickly and easily determine what has changed since the last revision. The image below shows a highlighted version of a drawing along with the highlight button circled in red.