
Flatter Files includes a built in review process for your deliverables. The review process provides a way to designate a reviewer for each drawing before it is released. The review process includes the ability to accept or reject the proposed revision. If you have an external review system either through an existing PDM system that you are integrating Flatter Files with or another review solution, then the review process can be skipped. Please see the Skip Review Process section below for details.
On Flatter Files, a checked in item means that the latest revision is the current revision and it is appropriate to use the drawing being viewed. If the item is checked out, then the current revision is possibly no longer the most recent revision. When the new item or updated item is uploaded, the item is checked out automatically. Administrators and Creators can also check out a drawing manually as well. Ideally, when you begin to work on the item, you first check it out.
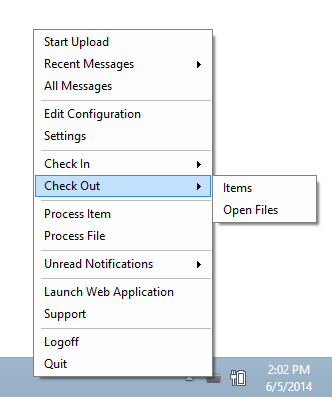
If an item has already been modified locally and you want to check it out, just perform an upload. The upload process will check the item out automatically. Otherwise, an item can be checked out manually two ways. The first way is from within the Uploader application. The image below shows the Uploader Menu with the Check Out options displayed. To check out a specific item(s), select the “Items” options. To check out all of your currently open files, click the “Open Files” option.
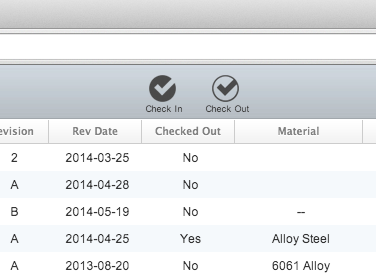
The second method to check out an item is from within the Web Application. Once logged into the Web Application, if you are an Administrator or Creator you have a check out button at the top center of the application. First, select the item(s) that you want to check out and then click the Check out button. This will mark the item(s) as checked out.
Once the item is checked out, anyone that tries to access the drawing will be notified as discussed in the Getting Started documentation page. Administrators can also block access to checked out items. Specifics on how to do this can be found in the Company Settings documentation page.
The check in is how you start the process of creating a new revision once the drawing has been modified or if the drawing is new. The check in process can occur from within the Uploader or from within the Web Application. Once you submit the drawing as checked in, there are three results that can occur. If there hasn’t been a new version uploaded, the item is checked in. If you select the option to overwrite the previous revision, then the new version checked in will become the current revision. The third and most common option is that checking in the item results in a review, which requires you to select a reviewer.
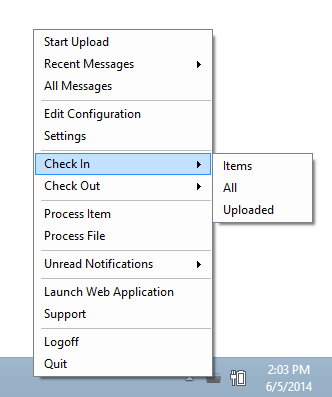
As shown in the image below, the Uploader provides three options for checking in items. The “Items” option allows you to search for and then select specific items to check in. The “All” options will check in all items that are currently checked out. Use this option with caution. The last option, “Uploaded” will check in all items that are currently checked out and have a new version uploaded for it.
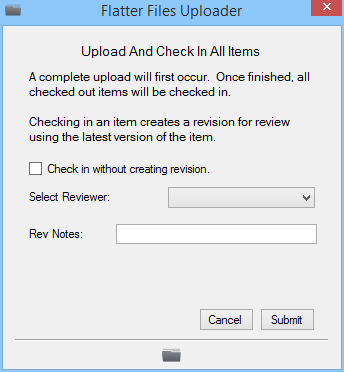
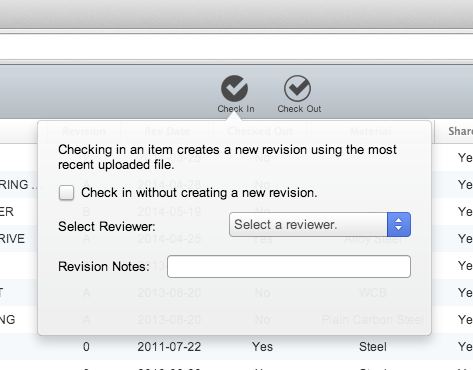
All three options will result in the Uploader displaying a window similar to what is shown in the image below. Checking the option “Check in without creating revision” will replace the current revision with the uploaded version but will not increment the revision or initiate a review process. This option is intended for the purpose of correcting a typo on a drawing where you don’t actually need to document the change. If you enable this first option then you can click submit to accept the check in. Otherwise, you must select a reviewer. Specific users within the account are specified as reviewers and they will appear in the drop down menu next to the Select Reviewer option. Optionally, you can also include revision notes. These notes will appear in the review notification that is sent to the reviewer.
Click submit to check in the drawing for review. If using the “All” or “Uploaded” check in process, then a full upload will occur and once complete the the appropriate check in will occur. Appropriate messages will be shown once this process is completed.
Items that have already been uploaded with the latest revision can also be checked in from within the web application. Select the item(s) to check in and click the Check In button at the top of the web application. The dialog shown in the image below will be displayed. The dialog shown contains the same content as when checking in items with the Uploader. Please refer to the previous section for details. Once complete, click the submit button to check in the item. The top right of the web application should display a notification with the result of the check in process.
If an item is checked in and it contains a revision property equal to the current approved revision, you will receive a warning message and the item won’t be checked in. The warning message will present you with three options on how to handle the item. You can move forward with creating the revision even though the item’s revision property value will no longer match the Flatter Files revision property. You can overwrite the current revision with this new item. Or you can cancel the check in so that you can go and increment the revision property to the new value. If this occurs often for you, consider using an Upload Trigger, which will force you to update the revision property before the item is uploaded.
Once the item has been checked in, the reviewer receives a Notification in Flatter Files with the review information. The reviewer will also receive an email to notify them to review the item. While the item is under review, it is still considered checked out if anyone attempts to view the item.
The reviewer receives a Notification within Flatter Files when selected as the reviewer. At this point the notification is only viewable by the reviewer and the user that checked in the item for review. The reviewer is the only one that can accept or reject the notification. The notification can be accessed from within the Web App, Uploader App and the mobile applications. The process is nearly identical for all three so this documentation will only discuss the web application.
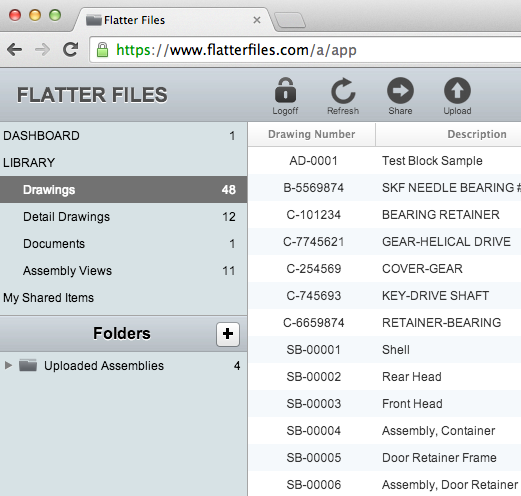
To view the notification, the reviewer should click on the “Dashboard” at the top left of the web application. The number next to the “Dashboard” entry indicates the number of unread notifications.
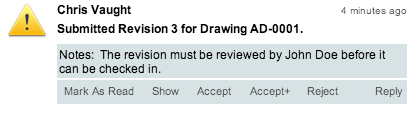
The Dashboard contains multiple view options with the default view as the Notifications view. Notifications display a list of each notification. Notifications can be in multiple states. The first is unread. This is indicated by bold title text for the notification. The image at the top left of each notification also indicates the status. The yellow triangle exclamation mark indicates that you need to respond to the notification. The green circle means the notification does not need a response. A red stop sign indicates that the reviewed item was rejected by the reviewer.
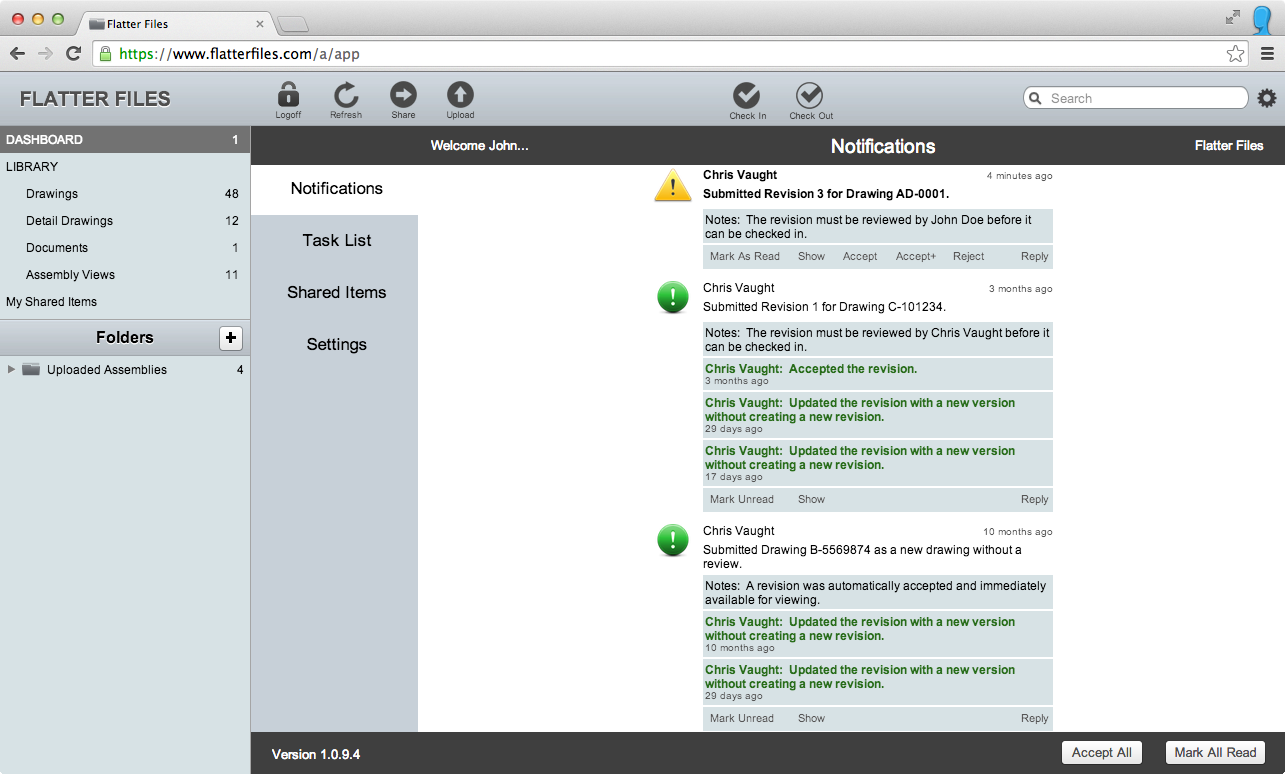
Notifications include a button row of actions that you can perform on the notification. For items that do not need a response, the actions consists of a Read/Unread toggle, a Show button to display the item and a Reply button. The reply button allows you to add a message to the notification. This allows the reviewer to submit notes regarding the item or discuss changes that should occur.
Notifications that require a response include the actions listed above as well as an Accept button, an Accept+ button and a Reject button.
Typically the reviewer will first want to view the item being reviewing by clicking the Show button. If you find the drawing acceptable, click the Accept button while viewing the item at the bottom left of the view or the Accept button located within the notification. Accepting the revision will release the item and make the new revision immediately available for viewing when the drawing is accessed. The notification text is also updated with the accepted revision. The notification will also be viewable by users.
The Accept+ button will mark the notification that you accepted it and allows you to add an additional reviewer to the notification. This will display the dialog to select the reviewer, who will be added to the notification and they must respond before the revision is created. The notification will now be viewable by the user that checked in the item in, the first reviewer and the second reviewer. This process of adding additional reviewers can be repeated multiple times.
To accept all items that you currently need to review, the reviewer can use the “Accept All” button at the bottom right of the Notifications view.
The Reject button rejects the item and the user that submitted the review will be notified via email. Alternatively, the reviewer can use the reply button to add a message to the notification with the reason for the rejection. The notification is only viewable by the reviewer and the user that submitted it. The user can then make modifications to the drawing and then check in the item again.
Once the item contains more than one revision, you can merge the current revision with the previous revision. This will effectively delete the previous revision. This is useful if you created a new revision but the item only contains typos or small changes that don’t warrant saving the previous revision. To merge the last revision, right click on the item and display the Modify menu. Then select the Merge Revision option.
If Acceptance Stamps are enabled then the reviewer will have an option or it can be required to stamp the resulting drawing that is being reviewed. To enable Acceptance Stamps, please see the Acceptance Stamps section in the Company Settings documentation.
Accepting a drawing when Acceptance Stamps are enabled results in the dialog shown below. The first option is to select whether you want the stamp added to the background or foreground of the PDF. If you add it to the background, then any overlapping content will appear on top of the stamp. If you add it to the foreground, then the stamp will appear on top of any overlapping content.
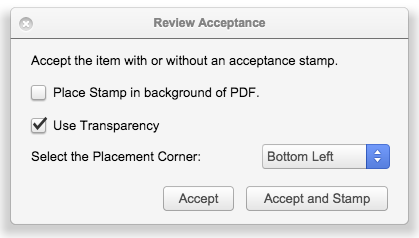
The second option in the stamp dialog, allows you to select the corner position that you would like to place the stamp. A default margin and size is used but this allows you to modify the general placement.
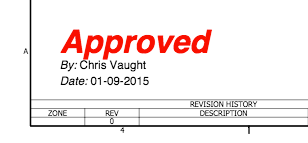
By default, there are then two acceptance options, either accept the drawing without adding your stamp or accept it and add your stamp. It is possible that accepting the drawing without a stamp isn’t an option based on your Company Setting. Click the Accept and Stamp button to add your stamp to the drawing. The image below shows an example stamp that was added to the bottom left corner of a drawing. As you can see, it includes the date and the user’s name that stamped the drawing.
If you have an external review system either through an existing PDM system that you are integrating Flatter Files with or other review solution, then it is sensible to skip the Flatter Files review process. This is handled slightly differently depending on the Upload Type that is being used.
If you are using the Manual upload type, then the only option to skip the review process is to only store the last revision on Flatter Files. To do this, simply check in each item using the “Check in without creating revision” method that is discussed in the Check In section above. This will overwrite the existing revision with the new file so only a single revision is kept on Flatter Files but a review never takes place. Using the “Check In Uploaded” method is a useful way to facilitate this option in a batch manner.
If you are using the SolidWorks EPDM or Autodesk Vault PDM integration upload type, then the review process will occur within your PDM system. There is no option to complete a review process within Flatter Files with this option. The PDM integration does provide the option to only keep the latest revision on Flatter Files as well as many other options pertaining to the revisions that are uploaded.
If you are using the Upload Trigger upload type, then once you have configured the Upload Trigger, enable the option “Check in items that have triggered a revision and skip the review process”. Once this is enabled, the review process will be skipped. Optionally, you can also enable the option to only keep the latest revision.