Create External Share from CSV File
Typically shares are created by selecting the items to share and then clicking the Share button. However, this tutorial will show how you can define the list of items to share in a CSV file, upload that CSV file and then create the share using that list of items.
Prerequisites:
- Access to Flatter Files as a user with the ability to share content externally.
- List of filenames or part numbers that you would like to share.
- The filenames or part numbers specified must already be uploaded to Flatter Files.
1. Create CSV File
- Create a CSV file with a column defined as either Filename or Part Number.
- Enter the unique Filenames or Part Numbers in that column to define the list of items you which to share externally.
- A simple example is shown below. This can be created in excel or in a text editor. If there is only the one column you must still define the column name but no commas are needed.
Part Number
BD-0002
AD-0001
2. Login and click the share button
- Login to your Flatter Files account.
- Make sure no items are selected (if an item is selected, right click and select “Clear Selection”).
- Click the Share button at the top of the web application.
- Since no items are selected the following dialog will be shown:
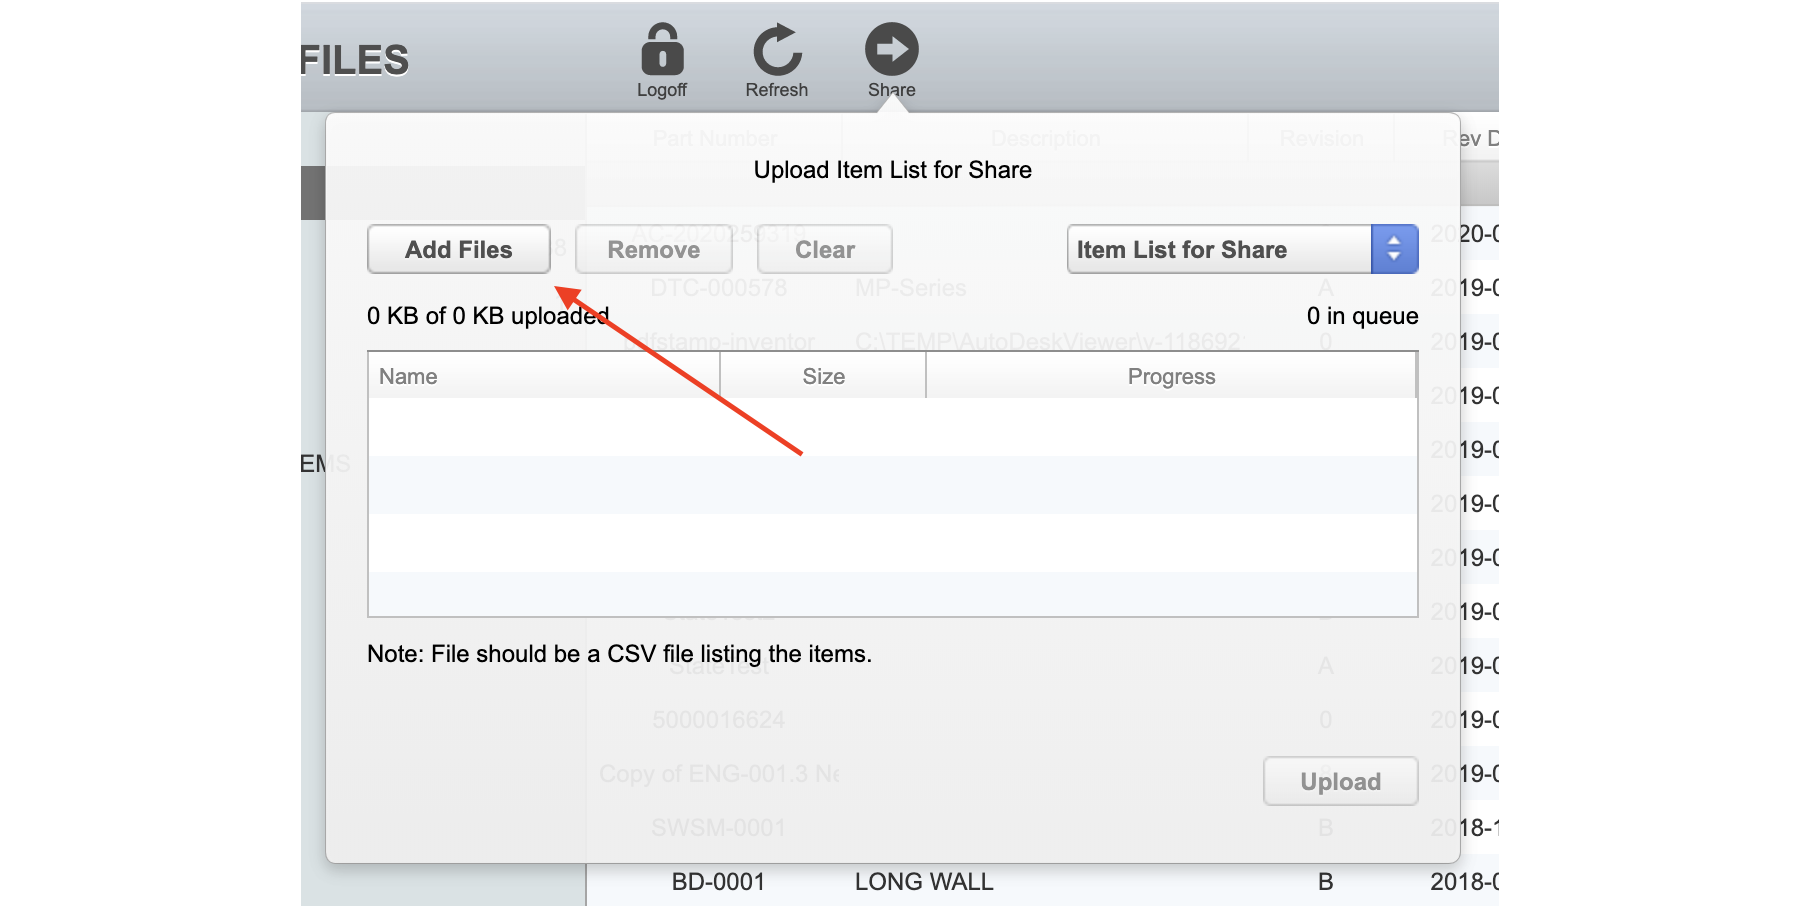
3. Upload the CSV file
- Click yes to display the Upload option.
- Click “Add Files” to add your csv file.
- Click “Upload” to upload your csv file.
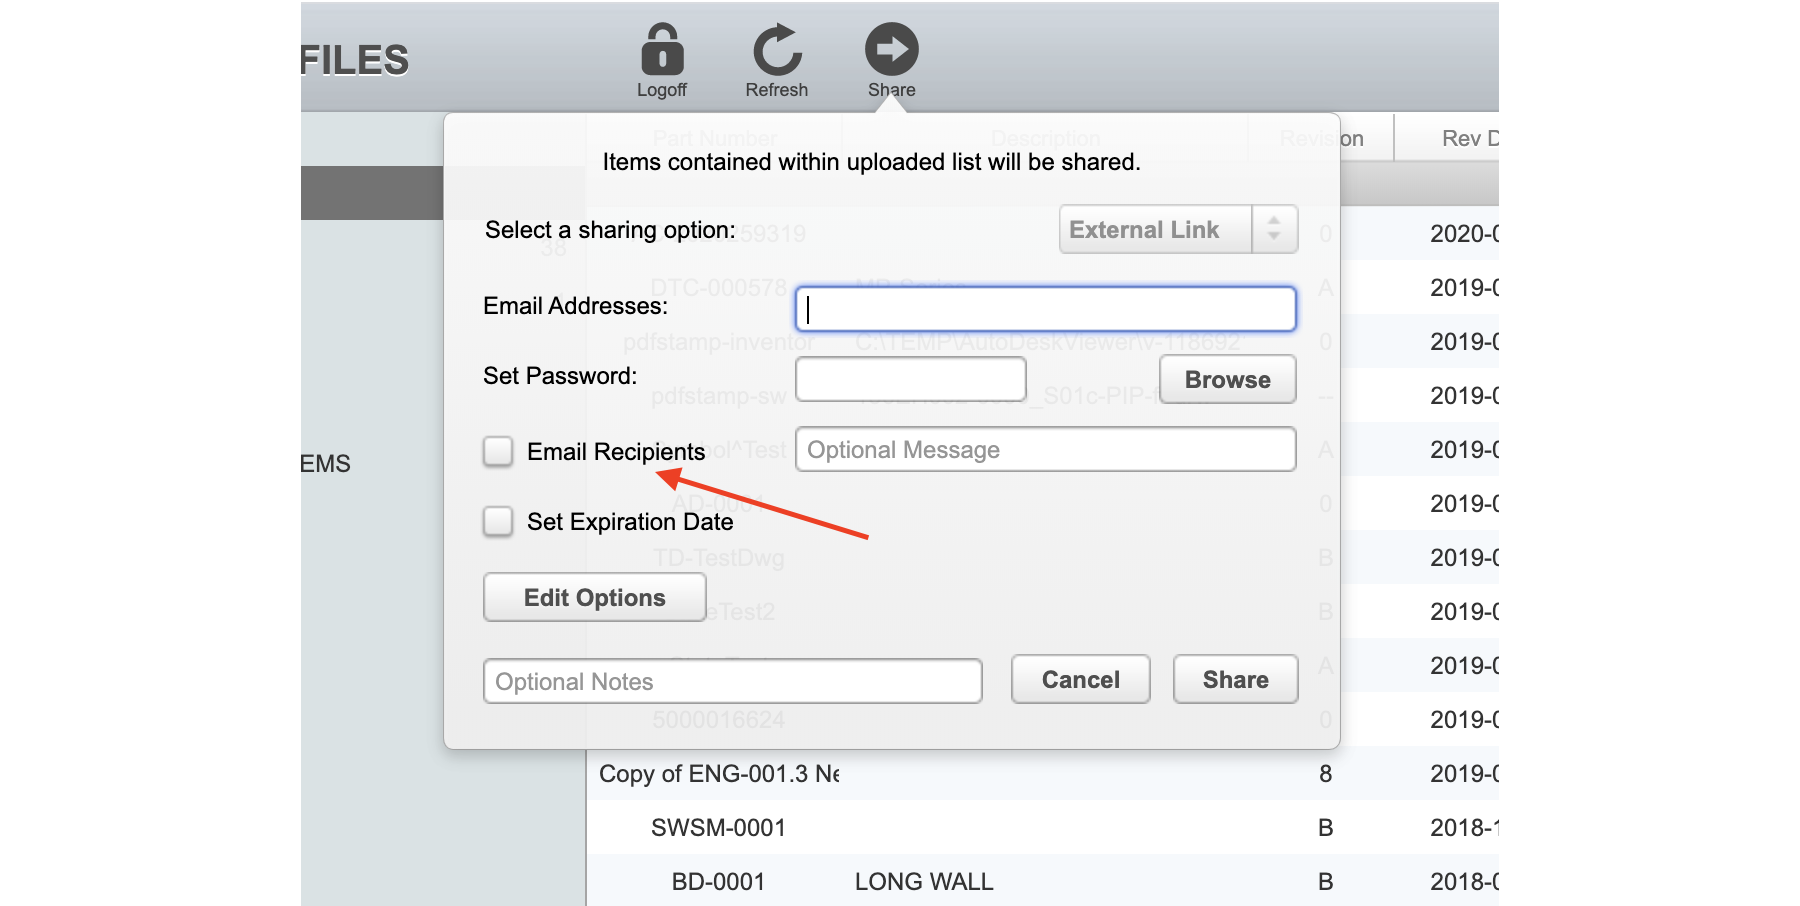
4. Create the Share
- This will display the normal share dialog such that you can enter the appropriate recipient and options.
- It is recommended that you uncheck the option to Email Recipients as shown below. This allows you to verify the item list is correct before sending the email.
- Click “Share” to create the share.
5. Verify Item List and Send Email
- The share will now be created. Depending on the size of the item list, it can take a little time to finish creating the share. Wait approximately 5 seconds for each item in the list. So if creating a share for 12 items, wait approximately 1 minute.
- Go to My Shared Items and click the “Refresh” button in the web application.
- The new shared link should now be shown.
- Click on “Item List” to display the list of items.
- Verify the list is correct.
- Close the item list.
- Right click on the shared link and select “Send Email.”
6. Complete
This tutorial is now complete. If you have any questions or need additional help please email [email protected].