SOLIDWORKS PDM Standard Tutorial
Flatter Files is designed to work with or without a PDM system. Flatter Files makes PDM systems better by enabling access to your content to everyone. This tutorial will describe the typical setup for using Flatter Files with SOLIDWORKS PDM Standard. It will assume that only SOLIDWORKS files are being uploaded but additional file types such as AutoCAD could also easily be supported.
Prerequisites:
- SOLIDWORKS PDM Standard installed and functioning.
- Access to a computer that has access to a PDM Standard Client View.
- SOLIDWORKS installed onto the computer with a valid license.
1. Install Flatter Files Uploader
Flatter Files works by locally processing your CAD files using your version of SOLIDWORKS and then uploading the resulting data to the Flatter Files Cloud. To do this, you install the Flatter Files Uploader application onto the computer you plan to use.
- On the computer you plan to use, click here to download the installer.
- Double click the installer to install the application.
- Follow the installation instructions. Once finished the application should automatically open.
- If the computer you are using does not have SOLIDWORKS, install SOLIDWORKS onto the machine.
2. Login and Display Configure Upload Folder
The Uploader application requires a user account to login. All configuration data for the Uploader will be saved to the users account. Once logged in, the steps below will result in displaying the window used to configure an Upload Folder.
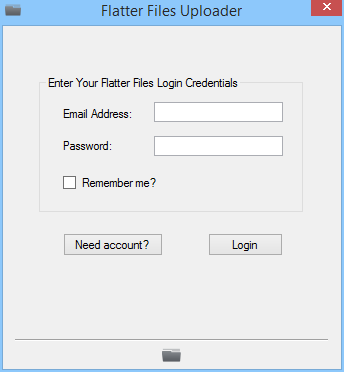
- Once the Uploader application is installed and opened, the dialog shown below will be displayed. Enter your credentials and then click “Login.”
- If successful and if this is the first time you have logged in to the Uploader, you will be presented with a welcome screen within the application. Click next and a dialog appears to configure your first upload folder. Skip to step 3 if you now see a window with the title “Configure Upload Folder.”
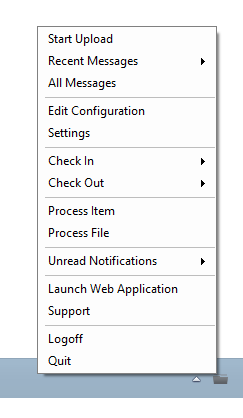
- If the welcome screen does not appear, then open the application menu by clicking the icon located in the bottom right of your task bar. This will open the menu shown below.
- Click “Edit Configuration.”
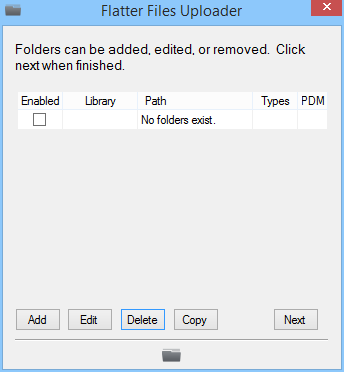
- The window shown below will be displayed.
- Click “Add” which will display the Configure Upload Folder window.
3. Configure Upload Folder
The Uploader application requires that you configure a folder for uploading. This folder that you configure is the only data that will be uploaded by Flatter Files. All configuration and settings are specific to the folder being configured. Multiple folders can be configured. This tutorial will only configure a single folder that contains all of your PDM Standard Vault data.
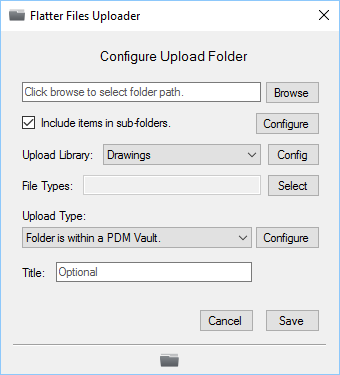
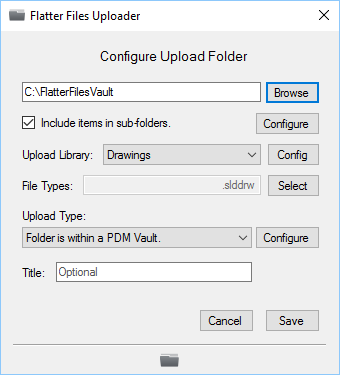
- You should now see this window:
- Click the “Browse” button and browse to the Root Directory of your PDM Standard Vault.
- Check the option “Include items in sub-folders” if it is not already checked.
4. File Types
Flatter Files supports various file types. Each file type that you would like to upload other than PDF and Tiff requires an appropriate program to perform the processing. In this tutorial, SOLIDWORKS must be installed for the purpose of processing the SOLIDWORKS native files. The steps below will show you how to configure the Uploader to only upload the SOLIDWORKS files contained in your Vault.
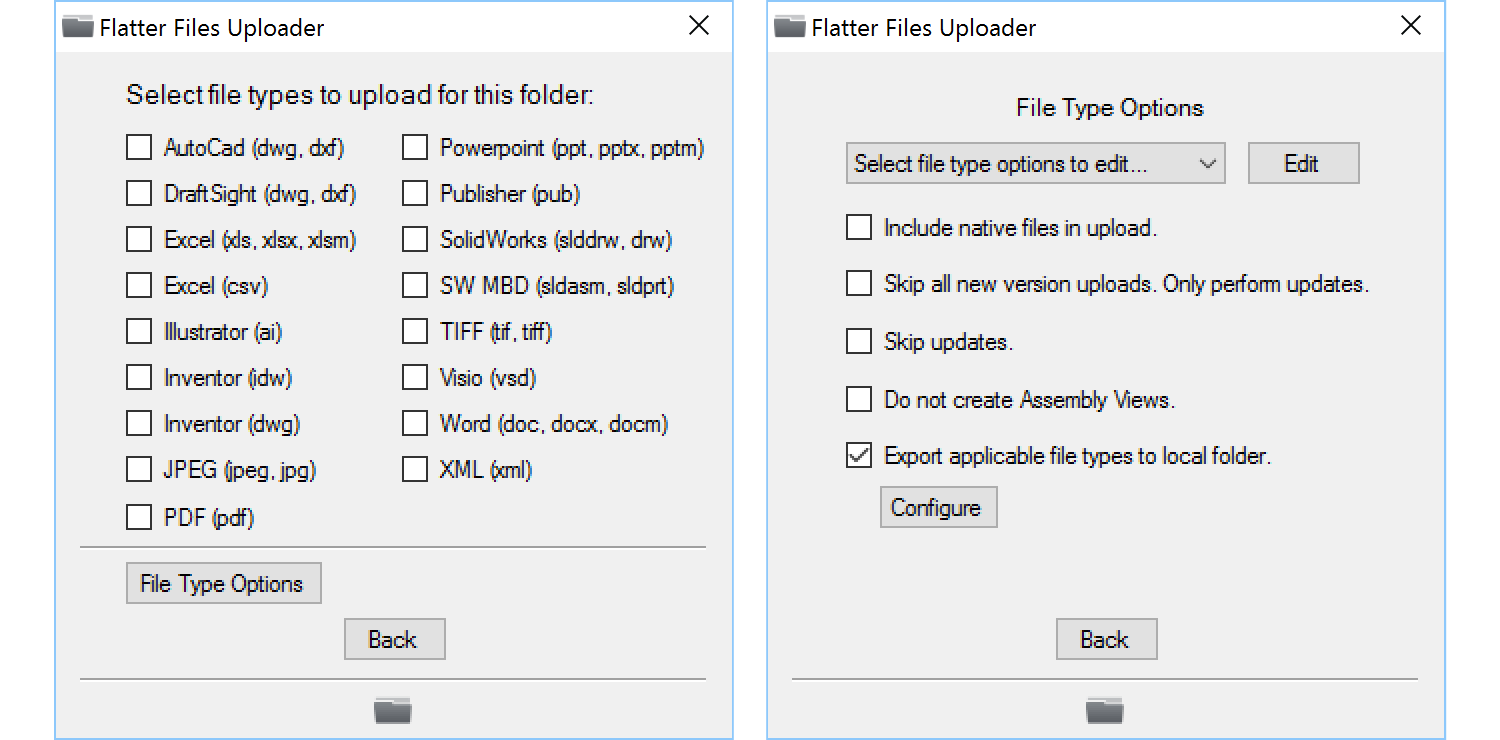
- Select the File Types to upload by clicking the button titled “Select.”
- This will display the left image shown below:
- Enable the file type option titled “SolidWorks (slddrw, drw).”.
- Click the button titled “File Type Options” to display the right image above.
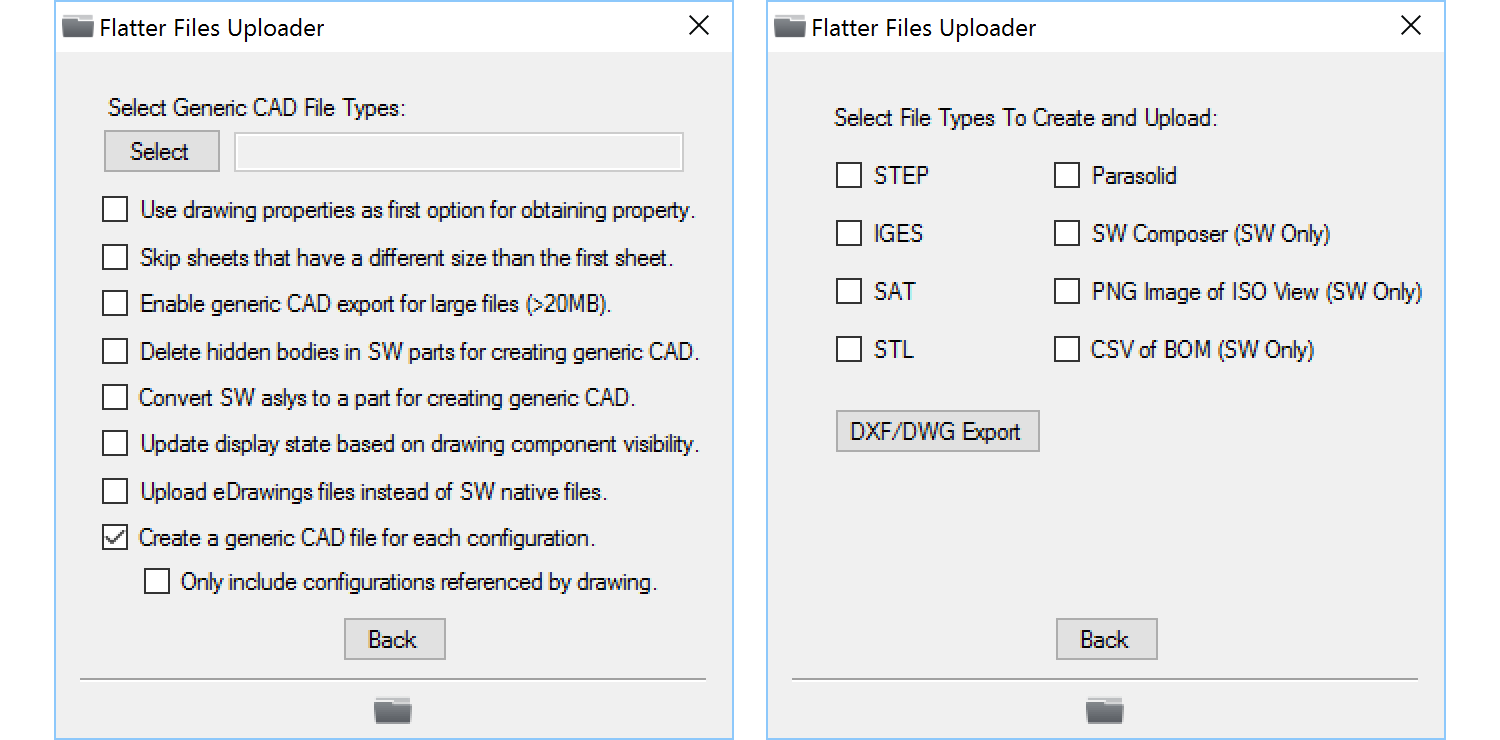
- Change the file type options to edit to “Inventor/SolidWorks Options”
- The window on the left should now be displayed:
- Click the select button to display the generic CAD file type options.
- Check any Generic CAD file formats that you would like Flatter Files to create and upload automatically for each item.
- Click back and the first option below the file types selected determines if the properties uploaded should be used from the Drawing or the Model. Enable this option if you keep the primary Part Number, Description, and other custom properties located in the Drawing instead of the Model.
- Click “Back” to return to the File Types window.
- Click “Back” again to return the the Configure Upload Folder window, which is shown below.
5. Configure PDM Integration
This step will configure the PDM Standard Integration such that files are only uploaded to Flatter Files once they are released. In addition, the checked out status is synced between PDM Standard and Flatter Files.
- Check the setting, “Folder is within a PDM Vault.”
- Click the “Configure” button.
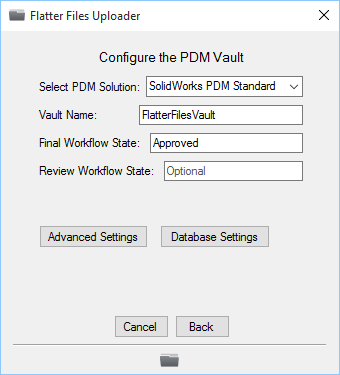
- This will open the window shown below:
- Change the PDM solution to “SolidWorks PDM Standard.”
- Enter your PDM Standard Vault name.
- Enter your Final Workflow State name which is typically “Released” or “Approved.” Multiple states can be entered by entering a comma between each state name.
- Leave the Review Workflow State name blank.
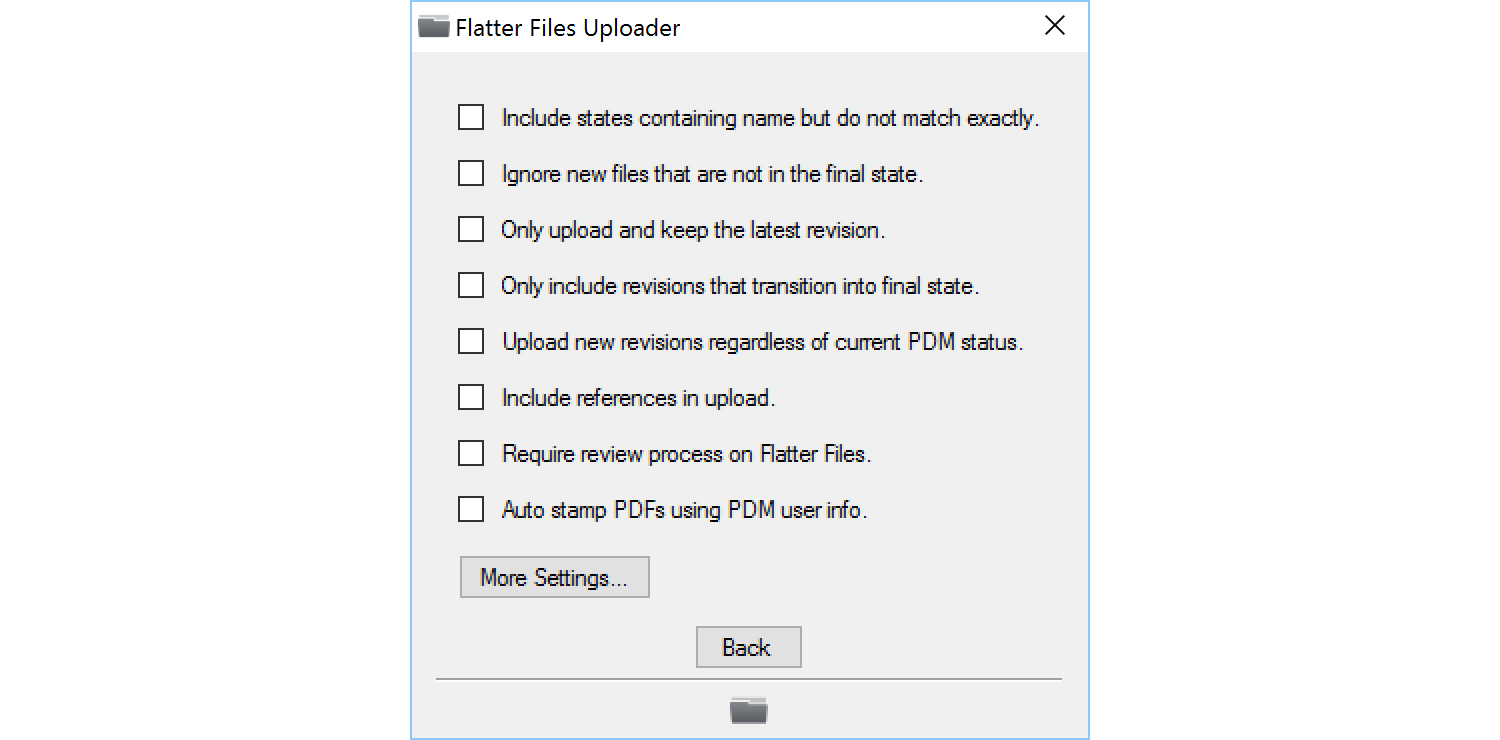
- Click the “Advanced Settings” button which will display the window shown below:
- Select any of the advanced options based on your preferences. For details please consult the PDM Advanced Settings documentation.
- Click the “Back” button to return to the Configure Vault window.
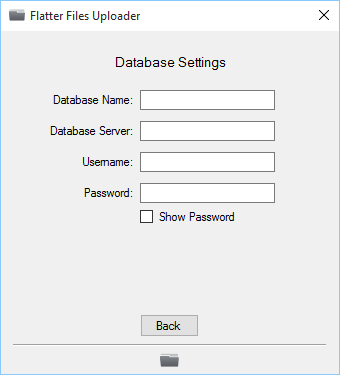
- Click the “Database Settings” button which will display the window shown below:
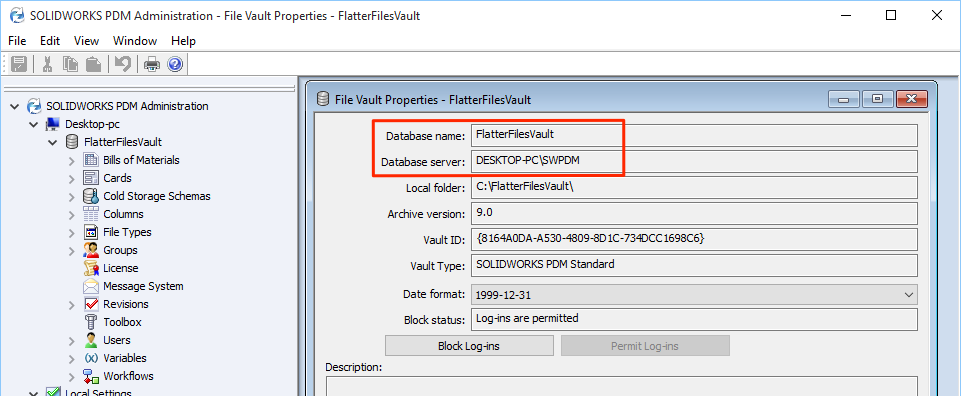
- Enter the Database Name, Database Server, Username and Password. The Database Name and Database Server can be found in the PDM Standard Administrator application. Within the Admin app, right click on the Vault and select properties. This should display the window shown in the screenshot below which shows the Database Name and Database Server marked with a red box:
- Click the “Back” button to return to the Configure Vault window.
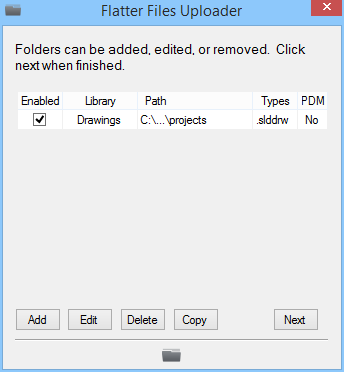
- Click the “Back” button again to return to the Configure Upload Folder window as shown below.
- Click the “Save” button to finalize the Upload Folder and save it.
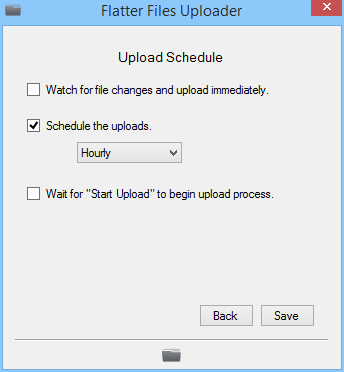
6. Schedule the Uploads
This step will allow you to configure the Uploader to perform uploads based on a schedule. Ideally you want the uploads to occur fairly regularly such that your data stays very current. Typically scheduling an upload to occur every 1-4 hours is ideal. When an upload occurs, the first thing it does is check for any changes, if none have occurred then nothing is uploaded.
- The Folder List window should now be displayed as shown below:
- Click next to display the Upload Schedule Options as shown below:
- Select the schedule that makes the most sense for your available resources. I would recommend enabling the second option and selecting a schedule of something between 1 and 4 hours.
- Click the “Save” button.
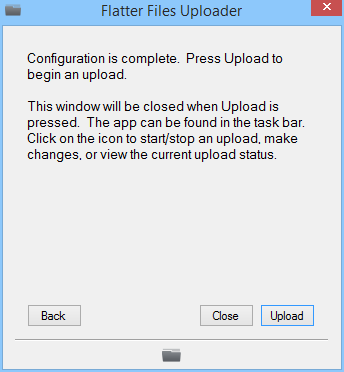
7. Start Upload
This step will manually start the first upload.
- The image below should now be shown:
- Click the “Upload” button to perform the first upload.
- The window will now be closed.
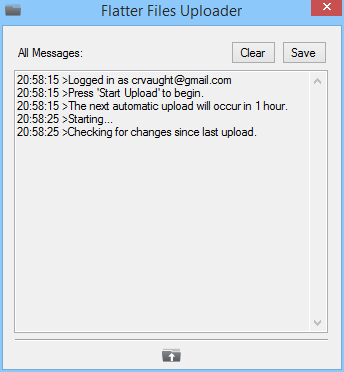
- To view the status click the icon in the task bar to display the menu.
- Select the option “All Messages.”
- The window displayed is shown below:
- A log of messages will continuously be added during the upload process. Once complete the last message will indicate the amount of time until the next upload.
- Viewing the messages during the upload is not required or by any means necessary during normal operation.
8. View Drawings in Web Application
At this point, your drawings are now accessible for viewing in the Flatter Files web application as well as on the mobile applications for iPhone, iPad, and Android. The steps below will view a drawing in the web application.
- Click this link to open the web application or go to www.flatterfiles.com and click Login at the top right.
- Enter your Login credentials.
- Your uploaded drawings will be shown, double click on an item to display the PDF or enter a search query in the top right search box to located the specific drawing.
- Additional details regarding drawing access can be found here
9. Complete
This tutorial is now complete. Your account should now be integrated with your SOLIDWORKS PDM Standard Vault. As you create new revisions in PDM Standard they will now also automatically be uploaded to Flatter Files. If you have any questions or need additional help please email [email protected].